My share for today is a Wrap A Round Holder for four of the 4" x 4" Spooky Night Cards and Envelopes that I made. Let's take a look:

Above is a picture of the Wrap A Round 4" x 4" Card Holder with a Belly Band and a Seasonal Tag. I LOVE Autumn and creating with Stampin' Up's new Holiday products. Always so much fun!

I'll start with the Belly Band from Old Olive Cardstock which measures 1-1/4" x 11". I scored the Belly Band so it has 3/4" wide sides and 4-1/2" in-between for the front and for the back. I adhered the band together with Mono Multi Purpose Glue.
I cut a length of SU's 5/8" Burlap Ribbon, wrapped it around the Belly Band and stapled it in the center of the front of the band.
Using SU's Layering Ovals, I die cut the Second Largest Scalloped Oval from Basic Black Cardstock.
Using SU's 2-1/4" Circle Punch, I punched out the Moon and Tree from SU's Moon and Tree Patter Designer Series Paper. I adhered the Circle to the center of the Oval with Mono Multi Purpose Glue in the Center only.

Using SU's Painted Harvest Stamp Set, I stamped 2 of the Leaves in Old Olive Ink onto Old Olive Cardstock and punched them out with SU's Leaf Punch.
Using SU's Pick a Pumpkin Stamp Set, I stampe 2 of the Leaf Stems in Old Olive Ink onto Old Olive Cardstock and die cut them out with the coordinating Patterned Pumpkins dies. I also die cut the 3 of the Berry Stems from Pumpkin Pie Cardstock.
I adhered all the die cut and punched pieces underneath the edges of the Moon and Tree Circle with Mono Multi Purpose Glue as shown in the picture above. (I trimmed the Leaf Stems down so there were 3 sections of leaves, the Berry Stems so there were 4 sections of Berries and trimmed off the most of the stem from the punched Leaves.)
I adhered two of the wooden Leaf from SU's Touches of Nature Elements to the Moon Circle with Mono Multi Purpose Glue.

Using SU's Seasonal Chums Stamp Set, I stamped the Pumpkin Tag onto Shimmery White Cardstock and die cut it out with the coordinating Seasonal Tags dies. Using my Aqua Painter, I water colored my Pumpkin Tag with Pumpkin Pie, Old Olive and Daffodil Delight Inks.

Using Seasonal Chum's Stamp Set, I stamped my Sentiment in Basic Black Archival Ink on the inside of my Tag.
I pulled out four threads from a length of the 5/8" Burlap Ribbon, tied them into a Bow and adhered the Bow with Mono Multi Purpose Glue.
I tied my Pumpkin Tag under the Bow with two of the ends from the Burlap threads.
I adhered one of SU's new Glitter Enamel Dots in Old Olive to the center of my Bow.
I adhered two of SU's new Black Basic Jewel Rhinestones to the eyes of the Pumpkin.

For the Wrap A Round Holder:
Basic Black Cardstock cut at 4-1/2" x 12"
Score at 2-1/2" - 2-3/4" - 7-1/4" - 8"

Basic Black Cardstock cut at 6-3/4" x 4-1/2"
Score at 3" and 3-1/4"

Adhere the 2 pieces of Basic Black Cardstock together so the distance between the two score lines is 4-1/2" as shown in the picture above. So, the first section is 2-1/2", the next section is 1/4", the next is 4-1/2", the next is 3/4", the next is 4-1/2", the next is 3/4" and the last section is 3". The 3" section will be the front Flap. Hope that makes sense.

Sorry for the blurry picture! I choose the Striped Patterned piece of SU's Spooky Night Designer Series Paper for the Flap on my Holder. It measures 3" x 4-1/2". I adhered it to the front of the 3" end of the Basic Black Cardstock with Mono Multi Purpose Glue and then rounded my corners with my corner rounder punch.

Above is a picture after you've taken the Belly Band off and opened up the Flap.

Above is a picture when you open the holder one more time. You can see the cards now.

The picture above shows the cards removed and my Envelopes peeking out from the next fold.

The picture above shows the Envelopes after opening the holder one more time.
I made 4 Envelopes for 4" x 4" Cards on my SU Envelope Punch Board.

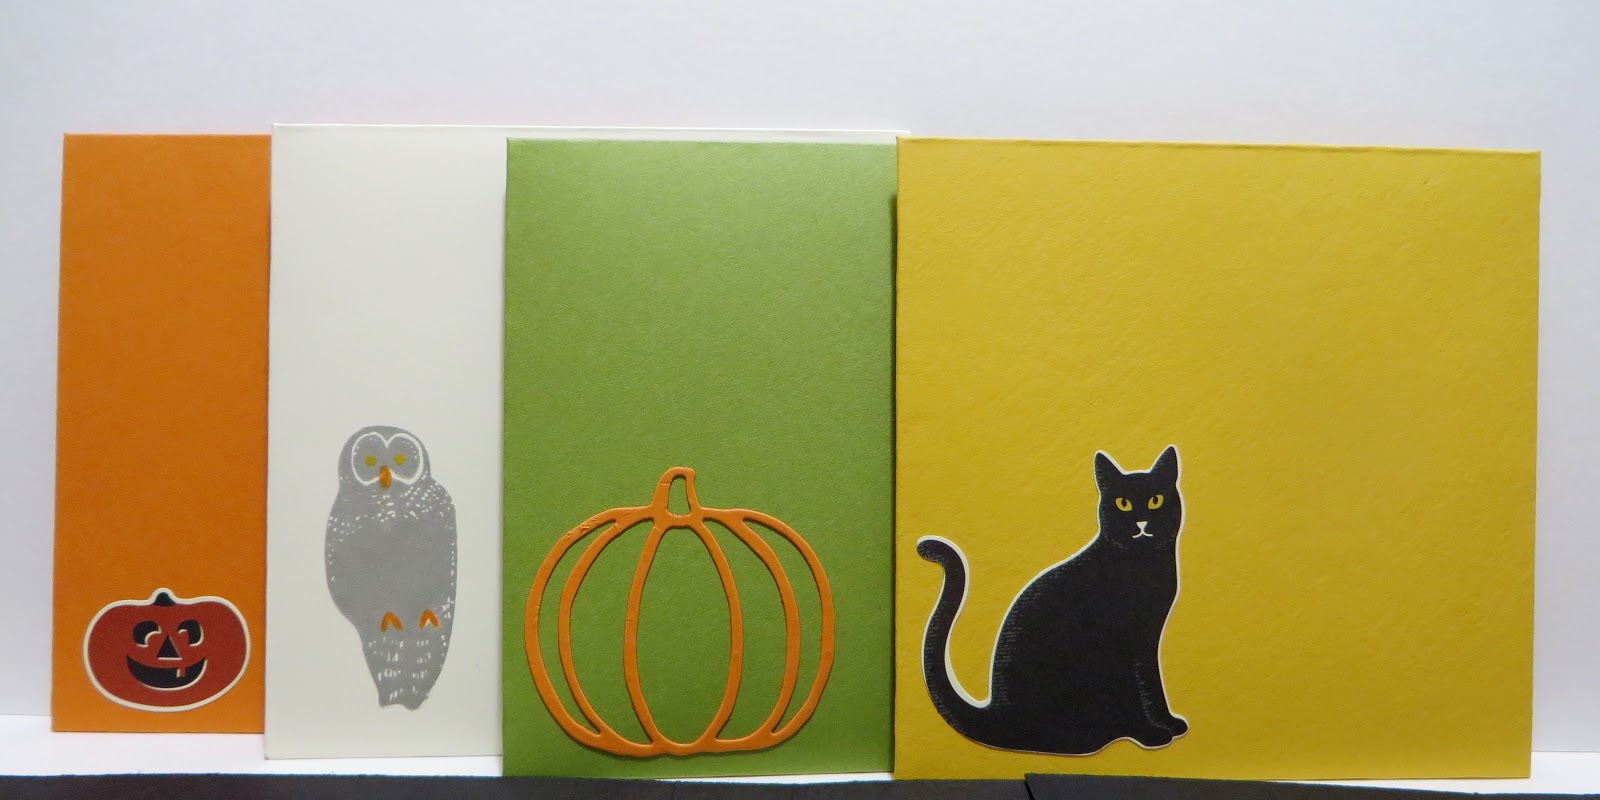
The picture above shows the four 4" x 4" Cards that I have been showing on my blog for the past week. I embellished the Envelopes to match my Cards.

Above is a picture of one of my Wrap A Round Holders that I made some time ago! The products used are now retired.

The picture above shows the Cards and Envelopes that I made.

Here's another one for 3" x 3" Cards and Envelopes that I made some time ago with a now retired Stampin' Up kit. I think it was called Hello Life; but, I'm not 100% sure.

It's fun to play around with these holders. You can stamp or embellish the outside flaps or even the inside sections.

The above pictures show the Cards that I made for the inside of the 3" x 3" Wrap A Round Holder.

If you made it through the end of my post without nodding off.... If you have any questions or need further information, please don't hesitate to e-mail me at dodge3670@aol.com.
That's all I have for today. Thanks for stopping by my blog.
If you are interested in purchasing Stampin' Up products, you can order from me on-line at www.stampinup.com and please choose me, Lynn Gauthier, as your Demonstrator.
If you would like to visit my Pinterest Boards, Please click on the link below:
Here
If you would like to become a Paper Pumpkin Subscriber with me, Please click on the link below to sign up.
Here
PLEASE GIVE CREDIT WHERE CREDIT IS DUE!
I recently discovered that people are using my cards and/or projects, duplicating them and entering them into challenges, using them for their own card classes and (using them on their blogs as their own creations) - Please give credit where credit is due. My cards and projects are my own creations and are not to be used in challenges, blog hops, card classes or sold at craft shows; etc., for profit. I don't mind if you duplicate my creativity to pass on to family members or friends as gifts or Occasions cards; but, PLEASE be considerate of others creativity! Thank you!
WOW Lynn......You totally OUT-DID yourself on this post. Your wrap around 4x4 card holder is just the living end. I adore how you used the pumpkin chum to sneak a special little message to a friend. THANKS for taking the time to write this all up.....I LOVE IT!
ReplyDeleteSo cute, Lynn! This would be a great project for a class! That belly band is over the top!! TFS
ReplyDeleteThanks Kadie and Dawn for your kind comments! You sure know how to make me feel better!!! Blessings!
ReplyDelete