Hope everyone had a great weekend! I got to do a little shopping and found these Color-Changing LED Candle Lights and thought they would be really cool to embellish. I got carried away and made three and I could have kept going without a problem! Let's get started with the first one:
Now isn't that just stinkin' cute! It is really hard to capture the lights in a picture and the picture really does not do it justice. I could watch the color change in the candle forever; but, they only last 60 hours.
The ghost and pumpkin with leaf are Tim Holtz dies and embossing folder. The rest of the embellishments are from Stampin' Up.
The two bats were stamped using Stampin' Up's Cheer All Year Stamp Set and fussy cut. I then adhered them to skinny pieces of SU's Window Sheets so they look like they are flying in the air. I colored two SU Basic Jewel Rhinestones with a black Sharpie marker and adhered them to the bats for eyes.
Notice the black spider web doily from Stampin' Up. The doilies have been a great hit with Customers and have gone into back order several times now.
Now that's some awesome layering of snowflakes. The snowflake on the candle is from a retired Stampin' Up kit and I had a couple left.
The two snowflakes suspended on pieces of SU's Window Sheets are from SU's Flurry of Wishes Stamp Set and punched out with SU's Snow Flurry Punch.
I embellished the snowflakes with SU's Basic Jewel Rhinestones.
Notice how I used the back side of SU's Black Spider Web Doily. It's white on the reverse side.
Ahhhhhh...I LOVE butterflies! And, I don't care what time of year it is!
The butterfly on the candle and the butterfly on the upper left are die cut from SU's Bold Buttery Framelits and Butterflies Thinlits Dies. I LOVE these dies!!
The butterfly on the upper right is punched from SU's Elegant Butterfly and Bitty Butterfly punches.
I pulled a thread from a piece of SU's 1 1/4" Burlap Ribbon for the butterflies antenna and embellished them with SU's Basic Jewel Rhinestones.
The two leaves on the candle behind the butterfly were die cut from SU's new White Corrugated Paper using SU's Ovals Collection Framelits. I sponged them with SU's Pear Pizzazz Ink and adhered them with SU's Fast Fuse.
Notice the SU Spider Web Doily. I sponged the white side with SU's Pear Pizzazz Ink.
All the embellishments on the candles were attached to a 1/2" belly band on each candle.
I may be missing in action for a few days in the next couple weeks. We are doing some remodeling upstairs and I have a lot of staining to do! Hope you have better plans than me as I really don't enjoy staining.
I sure hope you enjoyed my project today and thanks for stopping by my blog!!
If you are
interested in purchasing Stampin' Up products, you can order from me
on-line at www.stampinup.com and please choose me, Lynn Gauthier, as
your Demonstrator.
This is my first blog and it is still under construction. I have yet to receive my Watermark so the picture's
are copyright Lynn A. Gauthier, 2015 Stampin' Up.
The content in this blog is the sole responsibility of the site owner, an Independent Stampin' Up! Demonstrator.
Oh My Goodness...what a beautiful set of cards! Stampin' Up's October Paper Pumpkin called Blissful Bouquet is just gorgeous. I had so much fun stamping and assembling my cards. Let's take a peek:
Here's the first three cards and envelopes. These three cards are A2 size 5 1/2" x 4 1/4". The colors are just stunning. And look at all the stamping I got to do; all those flowers and leaf stems. What a neat font on the sentiment. There is 13 awesome photopolymer stamps in the kit.
These three cards are 5" x 3 1/2". I got to stamp the outlines on all the flowers and the sentiment. There's a sheet of gold leaf and leaf stem stickers too!
And, these three cards are 3" x 3". I got to stamp all the leaf stem outlines. I did pretty good but I missed on a couple of them. =) You get four of each die cut that you stamp the sentiment on so there is an extra of each. Good thing as I stamped my first sentiment up-side-down! Oopsy!
I'm going to stamp on the envelopes too! I ran out of time tho'. I wanted to be able to show you the kit today!
If you are interested in receiving a monthly Paper Pumpkin kit, please go to PaperPumpkin.com. Please choose me as your Demonstrator.
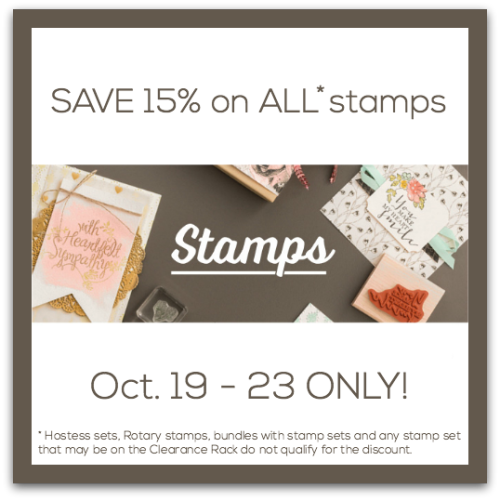
Tomorrow is the last day to take advantage of Stampin' Up's BIG stamp sale!
Thanks for stopping by my blog today!!
If you are
interested in purchasing Stampin' Up products, you can order from me
on-line at www.stampinup.com and please choose me, Lynn Gauthier, as
your Demonstrator.
This is my first blog and it is still under construction. I have yet to receive my Watermark so the picture's
are copyright Lynn A. Gauthier, 2015 Stampin' Up.
The content in this blog is the sole responsibility of the site owner, an Independent Stampin' Up! Demonstrator.
Well, I'm a little on the late side with my blog tonight. We are in the middle of some major remodeling and I will be so glad when it is completed. What a task it is turning out to be!
I put the finishing touches on my Stampin' Up All Boxed Up Spooky Halloween Box when we got home tonight! Check it out!
My top, bottom, side and back panels were decorated with Stampin' Up's Happy Haunting Designer Series Paper.
I cut a piece of the Happy Haunting DSP and adhered it with Mono MultiPurpose Glue to one of SU's clothespins.
I stamped the bat from SU's Cheer All Year Stamp Set, fussy cut it and adhered it also with Mono MultiPurpose Glue to the clothespin.
The word SPOOKY is from SU's Black Glimmer Paper and die cut using SU's Seasonal Frame Thinlits Dies.
I tied a bow with SU's Silver Cording and adhered it to the clothespin with a rolled up glue dot.
The word BOO is from SU's Perfect Plum Card Stock, die cut with SU's Boo to You Framelits Dies and adhered with Stampin' Dimensionals.
Below is a picture of the back of the box:
I stamped this pumpkin and stem from SU's Haunt Ya Later Stamp Set on SU's Shimmery White Card Stock and sponged it with SU's Tangelo Twist Ink. I colored in the stem with an Old Olive Stampin' Write Marker and adhered it to the pumpkin and then adhered it to the bottom front panel of the box all with Mono MultiPurpose Glue.
This sweet little black cat also from SU's Haunt Ya Later Stamp Set was stamped on SU's Shimmery White Card Stock and water colored with SU's new Basic Black Archival Ink. I fussy cut it and adhered it next to the pumpkin.
I stamped the small black bat from SU's Witches Night Stamp Set on SU Shimmery White Card Stock. I fussy cut it and adhered it above the pumpkin with a rolled up glue dot.
For both bottom side panels, I stamped the two bottles from SU's Sweet Hauntings Stamp Set on Whisper White Card Stock; one with SU Perfect Plum Ink and one with SU Old Olive Ink. These were all adhere to the bottom side panels with Mono Multi Purpose Glue.
I stamped and cut more of the bats from SU Witches Night Stamp Set and adhered them above the bottles with a rolled up glue dot.
Phew...that was a lot of work and a lot of Stampin' Up product. I hope you enjoyed seeing my project.
Thanks for stopping by my blog!
If you are
interested in purchasing Stampin' Up products, you can order from me
on-line at www.stampinup.com and please choose me, Lynn Gauthier, as
your Demonstrator.
This is my first blog and it is still under construction. I have yet to receive my Watermark so the picture's
are copyright Lynn A. Gauthier, 2015 Stampin' Up.
The content in this blog is the sole responsibility of the site owner, an Independent Stampin' Up! Demonstrator.
Today, I have another Stampin' Up All Boxed Up box that I embellished with additional Stampin' Up products. Let's take a look:
Now that's what I call 'decked out'!!!
My side panels are cut from Stampin' Up's Bermuda Bay Card Stock and cut at 2 3/8"x2" and 2"x1 7/8". I used SU's Crazy About You and Petite Petals Stamp Sets and Watermelon Wonder Ink to stamp my flowers and Old Olive Ink to stamp my leaves all on SU Whisper White Card Stock.
I used SU's 1 3/4" Scalloped Circle and Petite Petals Punches to punch out my flowers. These were adhered to the side panels with Stampin' Dimensionals. I used one of the small stickers in the kit and adhered it to the center of each flower.
I fussy cut the leaves and used Mono MultiPurpose glue to adhere them behind the flowers.
With SU Watermelon Wonder Card Stock, I cut a flagged end banner which is 1"x2 1/4". I adhered a full leaf branch to one of the banners included in the All Boxed Up Kit with Mono MultiPurpose glue. I stamped my sentiment on my Watermelon Wonder banner and adhered it to the leaf branch banner with Stampin' Dimensionals.
I tied my bow with the bakers twine and some SU Gold Metallic Thread (not included in the kit), cut a piece of the pompom trim and used a clothespin to attach everything to the top of the box.
I could embellish these boxes day in and day out!!! What fun and they make for quick, awesome gifts. I've filled mine with candy corn, M & M's and Miniature Tootsie Rolls. You can remove the clothespin to access the candy or you can fold the one end as you would a milk carton with the clothespin on and the candies will pour out the spout. I just LOVE these adorable boxes.
Come back tomorrow and I will show you one that I decorated for the Halloween.
If you are
interested in purchasing Stampin' Up products, you can order from me
on-line at www.stampinup.com and please choose me, Lynn Gauthier, as
your Demonstrator.
Thanks so much for stopping by my blog today!!!
This is my first blog and it is still under construction. I have yet to receive my Watermark so the picture's
are copyright Lynn A. Gauthier, 2015 Stampin' Up.
The content in this blog is the sole responsibility of the site owner, an Independent Stampin' Up! Demonstrator.
We sometimes tend to put the Stampin' Up Annual Catalog to the side when Stampin' Up releases their Holiday or Occasions catalogs. Today, I'm going back to the Annual Catalog and show you the Stampin' Up All Box Up Kit found on page154. Below is a picture of the components that come in the kit:
 The kit makes 10 boxes: 4" x 2 5/8" x 2 1/8". The kit includes cardstock circle tags; printed banners; gold foil stickers; baker's twine, pompom trim, die-cut boxes and clothespins.
You can complete the kit with Stampin' Up's All Boxed Up Stamp Set on page 63 of the Annual Catalog or a stamp set of your choice.
Remember, Stampin' Up is having a HUGE sale on stamp sets from Oct. 19th - Oct. 23rd.
These boxes make up quickly, are so cute and are great for gift giving!
Below are a couple pictures of two that I completed:
Please come back tomorrow and I'll show you one that I embellished with extra Stampin' UP product!
If you are
interested in purchasing Stampin' Up products, you can order from me
on-line at www.stampinup.com and please choose me, Lynn Gauthier, as
your Demonstrator.
Thanks so much!!!
This is my first blog and it is still under construction. I have yet to receive my Watermark so the picture's
are copyright Lynn A. Gauthier, 2015 Stampin' Up.
The content in this blog is the sole responsibility of the site owner, an Independent Stampin' Up! Demonstrator.


