My share for today is three Alternate 4" x 4" Cards that I designed using Stampin' Up's March 2017 Paper Pumpkin Kit called Bunny Buddies! It's Oh-So-Cute!
Let's take a look:
I just can't get enough of these cute little bunny faces. They are so fun to mix and match up for all sorts of fun faces!
My Card Bases are Dapper Denim, Sweet Sugarplum and Peekaboo Peach Cardstock cut at 4" x 8" and scored and folded at 4" for a side opening card.
My Card Front Panel is the Dapper Denim White Polka Dot piece from the 2016-2018 In-Color Designer Series Paper Stack cut at 3-5/8" x 3-5/8".
I adhered a length of SU's 3/8" Sweet Sugarplum Ruched Ribbon around the front of my DSP Panel and adhered it to my Card Base with Stampin' Dimensionals. I tied another length of the ribbon into a Bow and set aside.
Using SU's Layering Ovals Framelits Dies, I die cut the 3-1/2" Scalloped Oval from Dapper Denim Cardstock.
Using SU's Stitched Shapes, I die cut two of the 3-1/4" Oval Shape from Whisper White Cardstock. I sponged Sweet Sugarplum Ink around the edges. Set one Oval aside for the inside of the Card.
Using Bunny Buddies Stamp Set from the March 2017 Paper Pumpkin Kit, I stamped the Ears, Eyes, Mouth and Whiskers in Basic Gray Archival Ink. I stamped the Bow in Sweet Sugarplum Ink and added a Circle Enamel Shape.
Using SU's Balloon Builders Stamp Set, I stamped the Cheeks using the smallest Dot Stamp and Blushing Bride Ink.
I adhered the Inner Ear Stickers from the Kit to the Bunnies Ears.
I adhered my Bow with Mono Multi Purpose Glue.
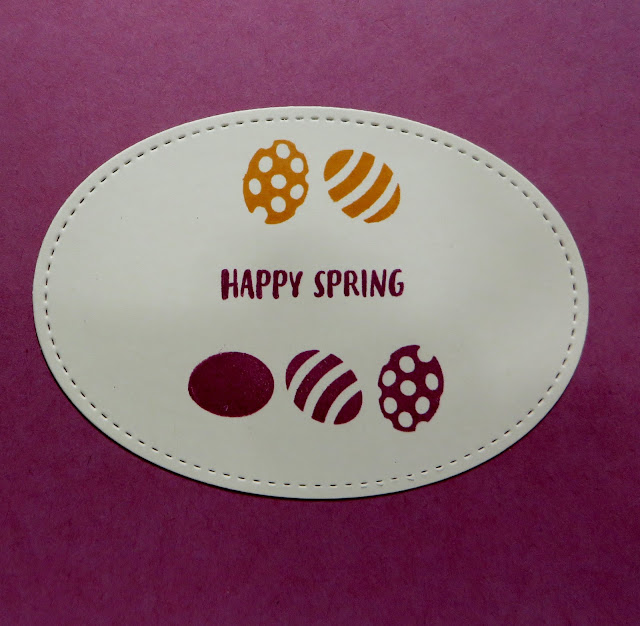
Using Bunny Buddies Stamp Set, I stamped my Sentiment and the 3 Eggs in Dapper Denim Ink, the two Eggs in Sweet Sugarplum Ink and adhered the Oval to the inside of my Card with Mono Multi Purpose Glue.
For the Card pictured above, I used Sweet Sugarplum Cardstock for my Card Base and a piece from SU's Playful Palette DSP Stack for the Card Front Panel.
I used SU's Peekaboo Peach 3/8" Ribbon around the Card Front Panel and for my Bow.
I sponged my Oval in Peekaboo Peach Ink.
I adhered a Peekaboo Peach Circle Enamel Shape to the Bunnies Bow Tie.
For the inside of this Card, I stamped the Sentiment and three Eggs in Sweet Sugarplum Ink and the two Eggs in Peekaboo Peach Ink.
For the Card pictured above, Peekaboo Peach Cardstock for my Card Base and a piece from SU's Playful Palette DSP Stack for the Card Front Panel.
I used SU's Dapper Denim 3/8" Ribbon around the Card Front Panel and for my Bow.
I sponged my Oval in Dapper Denim Ink.
I adhered a Dapper Denim Circle Enamel Shape to the Bunnies Bow Tie.
For the inside of this Card, I stamped the Sentiment and three Eggs in Peekaboo Peach Ink and the two Eggs in Dapper Denim Ink.
I then made my own Envelopes using my SU Envelope Punch Board for a 4" x 4" Card Size, Paper Size of 6-7/8" x 6-7/8" and a 3-1/2" Score Line Starting Point.
I assembled my Envelopes with SU's Tear & Tape Adhesive and cut my Envelope Insert with the matching DSP's at 3" x 3", scored through the center from point to point and adhered to the inside flap of the Envelop with Mono Multi Purpose Glue.
I also adhered matching DSP's to the outside flaps of my Envelopes. I adhered the DSP to the flap with Mono Multi Purpose Glue and then trimmed the excess paper with my SU Snips.
I added some die cuts from SU's Basket Bunch Stamp Set and Bunch of Baskets Framelits Dies to the bottom left corner of my Envelopes for a little added Easter effect!
Stayed tuned to my Blog as I have a couple 3D Easter projects coming soon!

There's a BIG SURPRISE coming to Paper Pumpkin in April! The April Kit was inspired and designed by Stampin' Up! CEO, Sara Douglass!
Sara tells us that the April Paper Pumpkin Kit is "Bold, vibrant and artistic - with a little bit of Sass!"
AND, Every April Paper Pumpkin Kit will include a FREE GIFT! We weren't told what it is; but, how exciting is that!
E-Mail me today at dodge3670 at aol dot com to order your kit! You won't want to miss this one!
That's all I have for today. Thanks for stopping by my blog!
If you would like to become a Paper Pumpkin Subscriber with me, Please click on the link below to sign up.
https://www.paperpumpkin.com/en-us/sign-up/?demoid=2124949
If you would like to visit my Pinterest Boards, Please click on the link below:
https://www.pinterest.com/dodge3670/https://www.pinterest.com/dodge3670/
PLEASE GIVE CREDIT WHERE CREDIT IS DUE!
I recently discovered that people are using my cards and/or projects, duplicating them and entering them into challenges, using them for their own card classes and (using them on their blogs as their own creations) - Please give credit where credit is due. My cards and projects are my own creations and are not to be used in challenges, blog hops, card classes or sold at craft shows; etc., for profit. I don't mind if you duplicate my creativity to pass on to family members or friends as gifts or Occasions cards; but, PLEASE be considerate of others creativity! Thank you!


These are adorable, Lynn! I love all the different bunny faces you created. The DSP for the inside of their ears is so cute! Great job, as always!
ReplyDelete