My share for today is another Easter Card that I designed using Stampin' Up's Basket Bunch, Little Cuties, Gorgeous Grunge and Easter Message Stamp Sets and Basket Builder and Layering Ovals Framelits Dies.
Let's take a look:

My Card Base is Crumb Cake Cardstock cut at 4-1/4" x 11" and scored and folded at 5-1/2" for a top opening card.
My Card Front Panel is Whisper White Cardstock cut at 4" x 5-1/4".
I sponged the top of my Card Front Panel with Soft Sky Ink and the bottom with Old Olive Ink. Using SU's Gorgeous Grunge Stamp Set, I stamped the Dots with Soft Sky Ink by stamping off once onto scrap paper and then onto my Card Front Panel without re-inking. I did this twice; once towards the upper left and once towards the upper right.
Using SU's Easter Message Stamp Set, I stamped my Sentiment in Memento Black Ink towards the bottom of my Card Front Panel.

Using SU's Little Cuties Stamp Set, I stamped the Chick and the Bunny Ears with Memento Black Ink onto Shimmery White Cardstock.

I then colored my Chick and Bunny Ears with my Stampin' Write Markers in Soft Suede, Pink Pirouette and Pumpkin Pie and then fussy cut them out. I adhered the Bunny Ears to the Chick with Mono Multi Purpose Glue.
I adhered the Chick to my Card Front Panel with Stampin' Dimensionals.

Using SU's Basket Bunch Stamp Set, I stamped my Large Easter Eggs onto Coordinating Cardstock in Sweet Sugarplum, Wisteria Wonder, Blushing Bride, So Saffron, Flirty Flamingo and Soft Sky.
I also stamped the Bunny in Memento Black Ink onto Crumb Cake Cardstock and colored him with Blushing Bride and Rich Razzleberry Stampin' Write Markers and highlighted the Bunny with my Copic Gray Marker.
Using SU's Basket Builder Framelits Dies, I die cut out my Easter Eggs and Bunny.
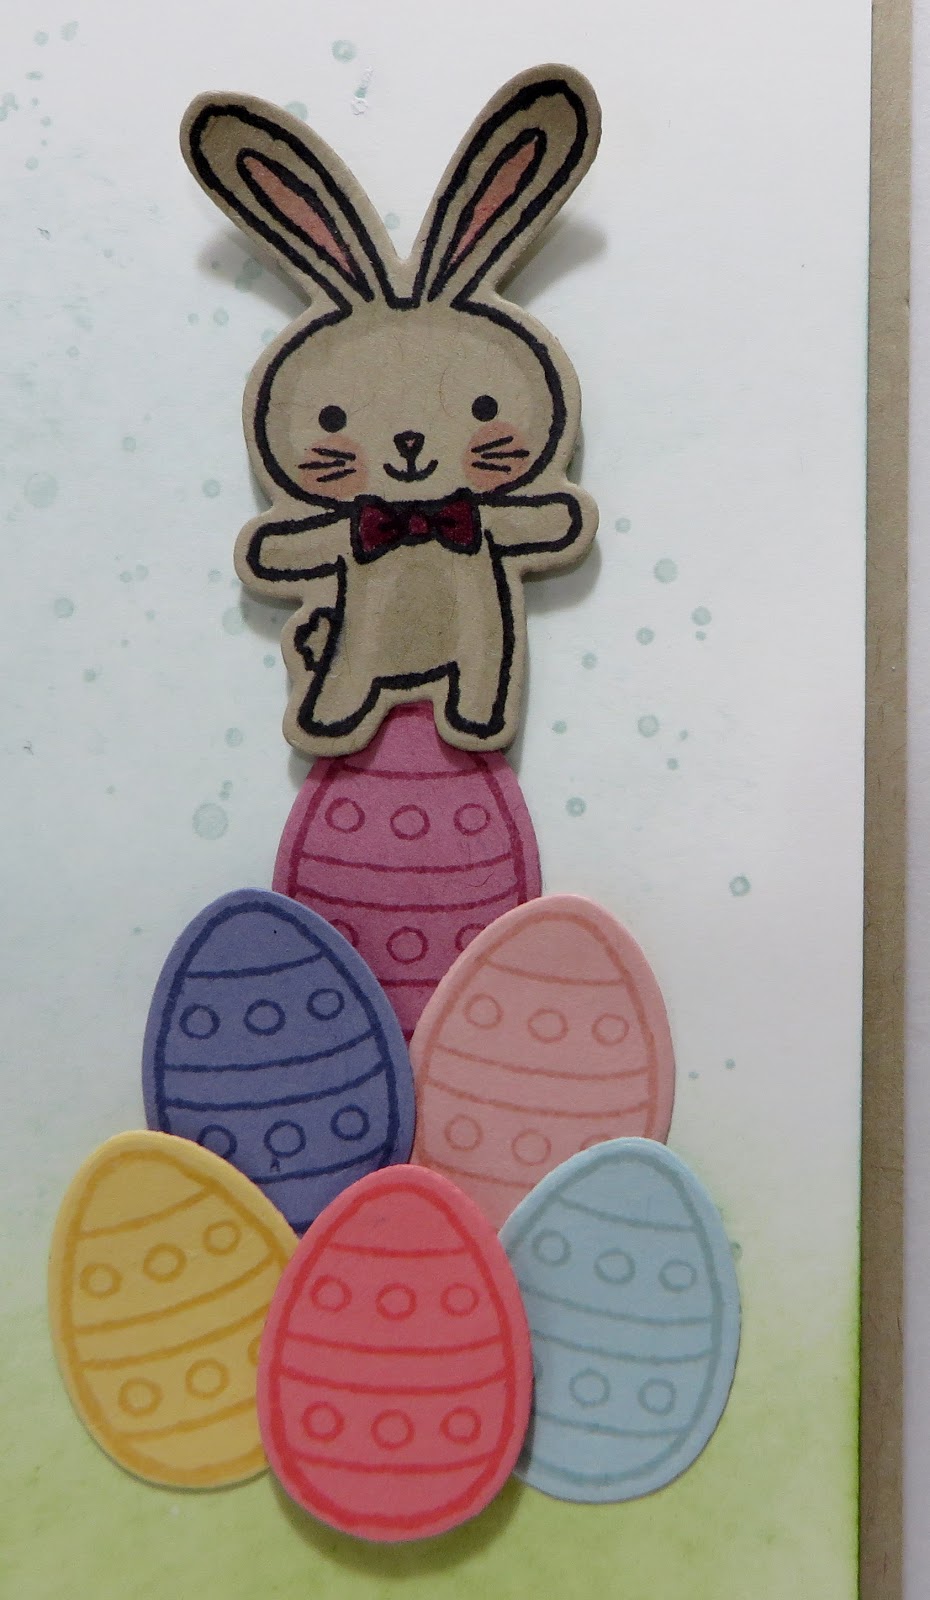
I adhered 5 Easter Eggs to my Card Front Panel with Mono Multi Purpose Glue as shown in the picture above. I adhered the 6th Flirty Flamingo Easter Egg with Stampin' Dimensionals.
I adhered the Bunny to the top of the Easter Egg pile with Stampin' Dimensionals and then adhered the Card Front Panel to the Card Base with Stampin' Dimensionals.
For the inside of my Card:
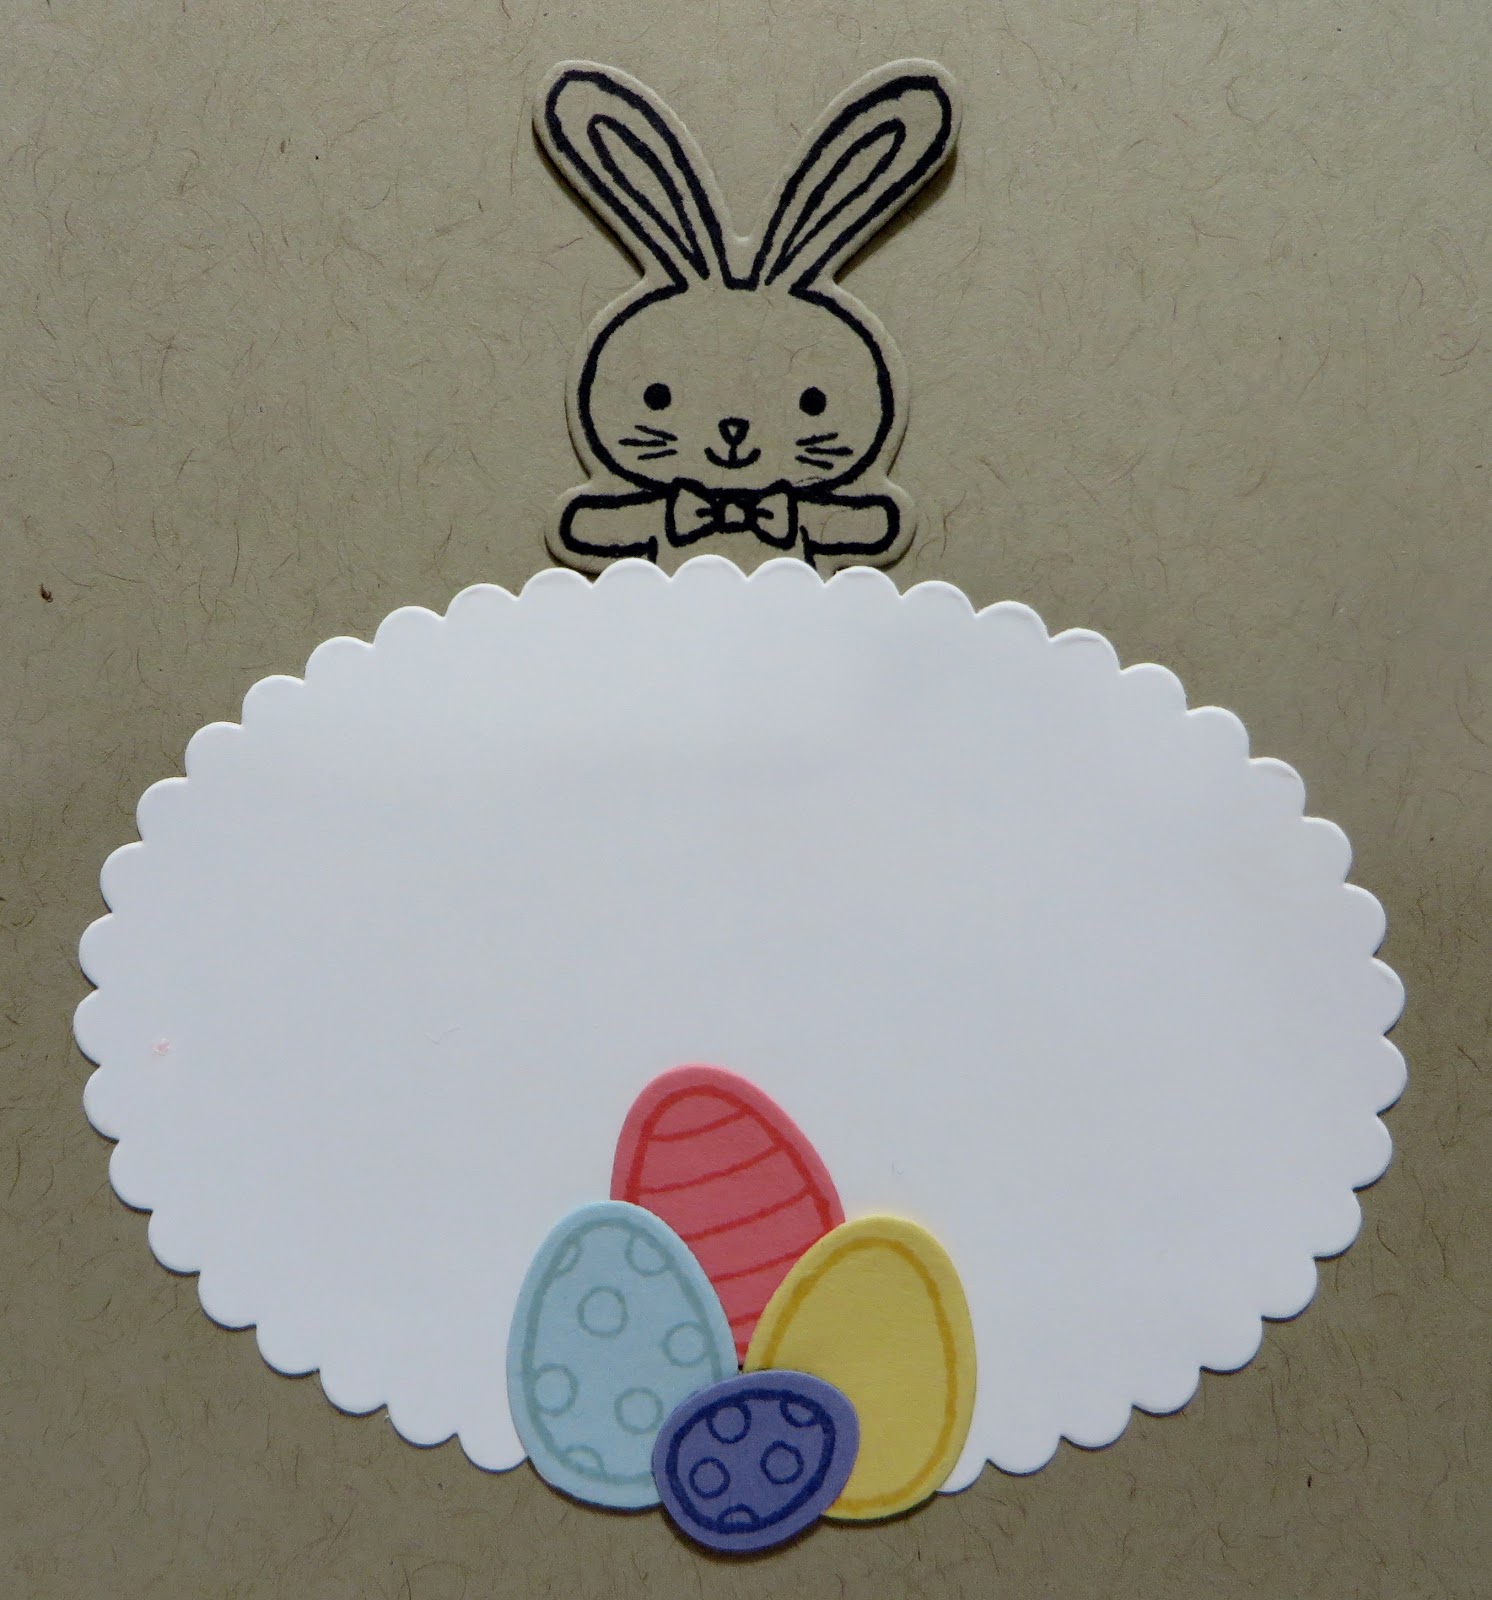
I stamped and die cut another Bunny from Crumb Cake Cardstock and adhered it to the inside of my Card using Mono Multi Purpose Glue.
Using SU's Layering Ovals Framelits Dies, I die cut the Large Scalloped Oval from Whisper White Cardstock and adhered it partially over the Bunny with Mono Multi Purpose Glue.
I stamped and die cut 3 Medium and 1 Small Easter Egg and adhered them at the bottom of my Scalloped Oval with Mono Multi Purpose Glue as shown in the picture above.

I wish you all a Happy, Fun and Safe Easter! Blessings to all!
That's all I have for today. Thanks for stopping by my blog!
If you would like to become a Paper Pumpkin Subscriber with me, Please click on the link below to sign up.
https://www.paperpumpkin.com/en-us/sign-up/?demoid=2124949
If you would like to visit my Pinterest Boards, Please click on the link below:
https://www.pinterest.com/dodge3670/https://www.pinterest.com/dodge3670/
PLEASE GIVE CREDIT WHERE CREDIT IS DUE!
I recently discovered that people are using my cards and/or projects, duplicating them and entering them into challenges, using them for their own card classes and (using them on their blogs as their own creations) - Please give credit where credit is due. My cards and projects are my own creations and are not to be used in challenges, blog hops, card classes or sold at craft shows; etc., for profit. I don't mind if you duplicate my creativity to pass on to family members or friends as gifts or Occasions cards; but, PLEASE be considerate of others creativity! Thank you!
No comments:
Post a Comment