Just a reminder: Stampin' Up added product to their Clearance Rack!!!
My share for today is a card that I designed using Stampin' Up's Seasonal Bells, Christmas Pines and Jar of Cheer Stamp Sets, Jolly Hat Builder Punch and Best Badge Punch, Bunch of Banners and Lots of Labels Framelits and Beautiful Branches and Christmas Stockings Thinlits Dies and Candy Cane Lane Designer Series Paper. (AND...Lynn's DSP)...too funny! You will have to read below....
Let's take a look:

Isn't this little Hedge Hog just the cutest!
I've gotten a few e-mails with this Hedge Hog creation and I'm not sure who created the original Hedge Hog using SU's Limited Edition Thoughtful Branches Bundle with the coordinating Beautiful Branches Thinlits Dies, so I can't give credit to that person for the Hedge Hog. There's many different ways that I've seen the Hedge Hog done so you can do a search on the internet to find the different Hedge Hog creations.
Anyways, this is how I made my card and Hedge Hog:
My card base is the Candy Cane Hearts from SU's new Candy Cane Lane Designer Series Paper. I cut it at 5-1/2" x 8-1/2" and scored and folded it at 4-1/4".
My card front panels are:
Real Red cardstock cut at 3-1/8" x 4-3/8"
(Quick/Funny story) - I made this card some time ago. I couldn't remember what DSP I used for the my second card front panel so I searched all the Designer Series Papers on SU's Website about 5 times and do you think I could find it - NO! I even went as far as pulling up a corner of the DSP to see what print was on the back. Hmmmmm.....NONE! What the heck! Well ... wait for it ... wait for it ... wait for it ... as my memory returned, I made the DSP myself!!! Talk about losing your mind; Goodness, Gracious! You're laughing at me, I can tell... =)
Amy and Kadie and Dawn...stop laughing at me!!! =)
O.K. Here it is...MY now FAMOUS DSP!!!
Whisper White Cardstock cut at 3-1/8" x 3-7/8" and I stamped it myself with the background stamp from SU's new Christmas Pines Stamp Set in Pool Party Ink...................YAY!!!
So, now it is going on two hours since I started this post....stop laughing at me!!! =)
I used SU's Best Badge Punch to scallop the edges of my Real Red Cardstock piece. Using my Project Life Corner Rounder Punch, I rounded the top corners on both pieces. I adhered MY DSP piece to the Real Red piece and to my card base using Mono Multi-Purpose Glue.
Phew...glad that part is over! Too, too and too funny!

Using SU's new Seasonal Bells Stamp Set, I stamped the Happy Christmas Banner Stamp onto Old Olive Cardstock with Basic Black Archival Ink. I die cut it out using SU's Bunch of Banners Framelits Dies and adhered it to my card with Stampin' Dimensionals.

Using SU's new Jolly Hat Builder Punch, I punched my hat pieces from Real Red and Whisper White Cardstocks and assembled my hat using Mono Multi-Purpose Glue.
I added Clear Wink of Stella to the Hat's Brim and Tassel.
Using SU's new Christmas Stockings Thinlits Dies, I die cut the Holly Leaves from Old Olive cardstock and the Holly Berries from Real Red Cardstock. I adhered them to the hat with Mono Multi-Purpose Glue.
I added Clear Wink of Stella to the Holly Berries and used my Signo White Gel Pen to make some highlight marks.
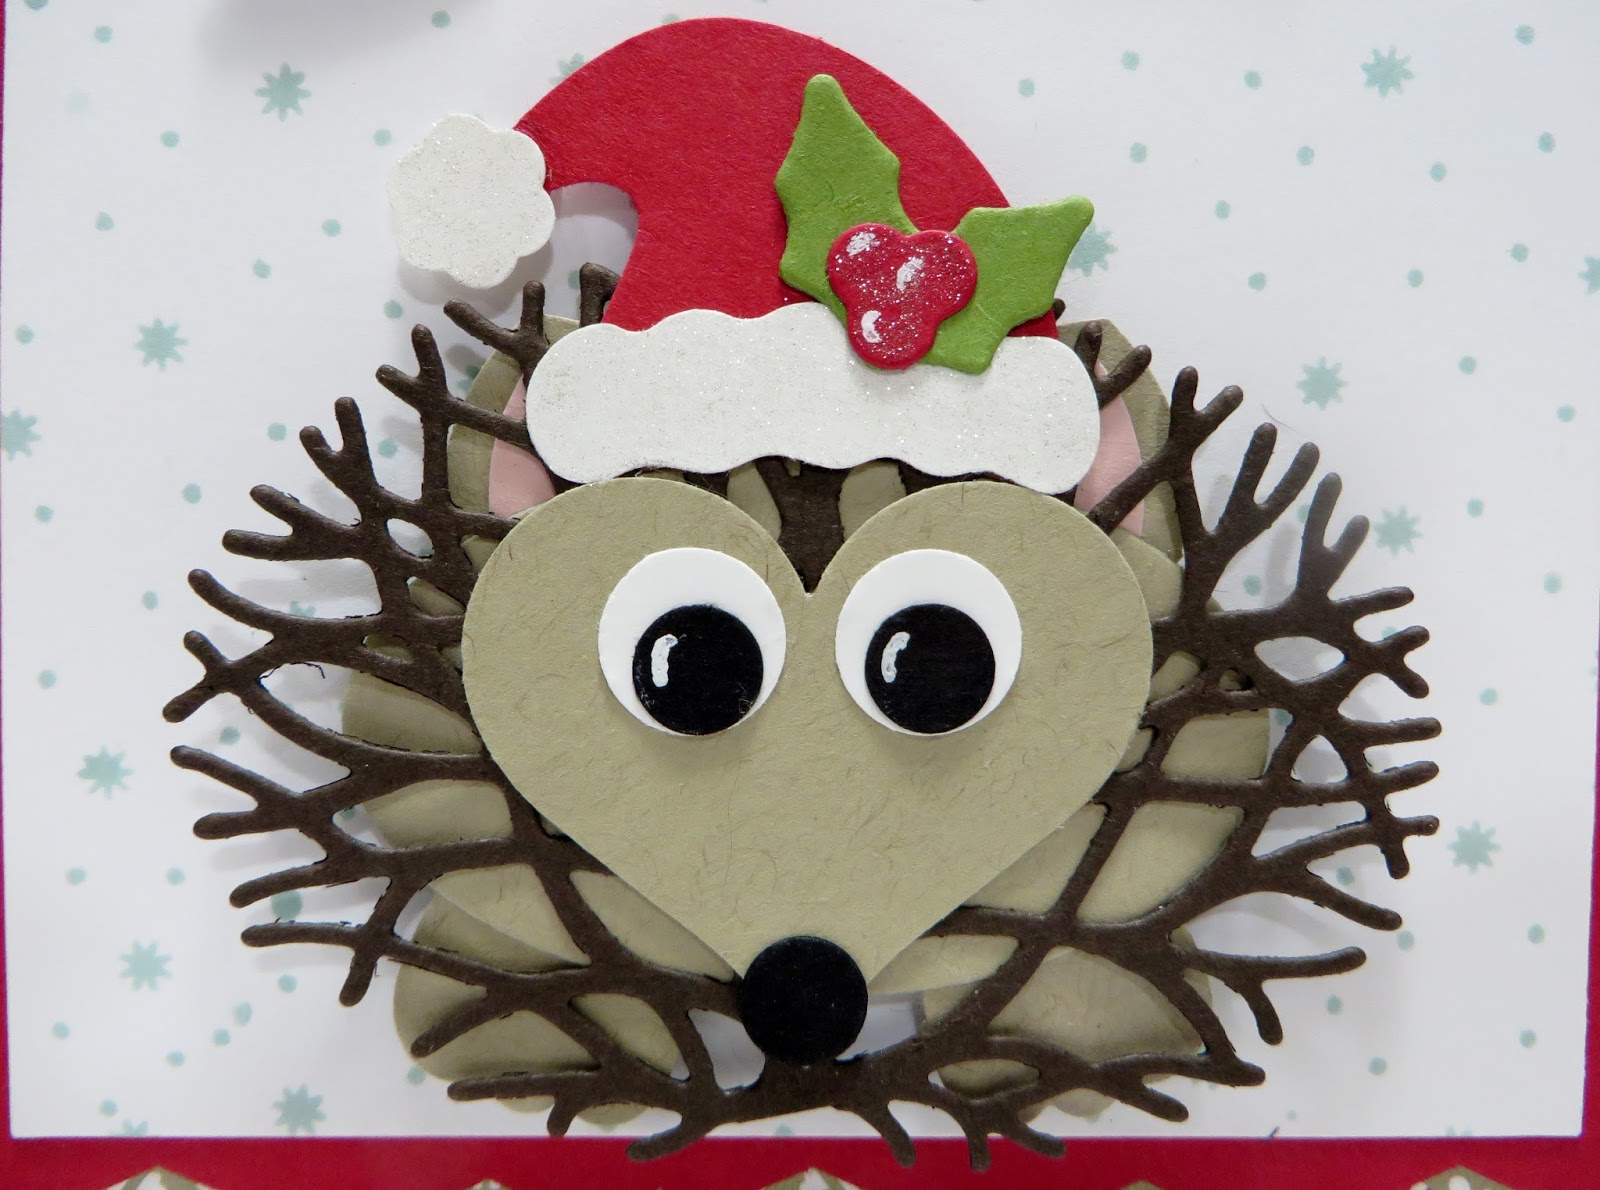
I used Crumb Cake, Blushing Bride, Whisper White, Basic Black and Early Espresso Cardstocks to make my Hedge Hog and adhered him together with Mono Multi-Purpose Glue.
SU's Beautiful Branches Thinlits Die was used to die cut out the Hedge Hog's quills.
Again, you can do a search on the internet to see what punches were used. If you want to know, e-mail me at dodge3670@aol.com and I'll re-create it and send it to you and list them on my blog post.

The scalloped edge was created using the Best Badge Punch.

Using SU's Lots of Labels Framelits Die, I die cut a label from Whisper White Cardstock, stamped the sentiment and the Peppermint Candies from SU's Jar of Cheer Stamp Set in Basic Black Archival Ink and Real Red Ink and adhered it to the inside of my card using Mono Multi-Purpose Glue.
And, My FAVE, of course, I adhered two Real Red Enamel Dots to my Banner!
Lesson Learned: Do Not wait so long to put a card or project on my blog!!! =)
And, stop laughing at me!!! =) I know you are!!!
That's all I have for today. Thanks for stopping by my blog!
I recently discovered that people are using my cards and/or projects, duplicating them and entering them into challenges and using them for their own card classes. My cards and projects are my own creations and are not to be used in challenges, blog hops, card classes or sold at craft shows; etc., for profit. I don't mind if you duplicate my creativity to pass on to family members or friends as gifts or Occasions cards; but, PLEASE be considerate of others creativity! Thank you!
If you are interested in purchasing Stampin' Up products, you can order from me on-line at www.stampinup.com and please choose me, Lynn Gauthier, as your Demonstrator.
This is my first blog and it is still under construction. I have yet to receive my Watermark so the picture's are copyright Lynn A. Gauthier, 2015-2016 Stampin' Up.
I'M SMILING Lynn!!!!! Your story just CRACKED ME UP!!!! I have to say that ..... I've DONE THAT! and it makes you think and re-think. I HATE WHEN I DO THAT. Thanks for the smile (LAUGH)!!!!! You made my day.
ReplyDeleteI'm laughing, Lynn, and you've made me feel better about the crazy things that I do!! :) Your hedgehog is adorable and so is your DSP!!
ReplyDelete