And, The HUGE blow out sale from December 1, 2016 – January 3, 2017 continues. All products (and discounts, if any) can be found in the Year-End Closeouts category of the online store at www.stampinup.com and will have a complete list of Year-End Closeout items and deals. Retiring accessories and items are only available while supplies last. All retiring items will be discontinued after Jan. 3, 2017.
You can order online at www.stampinup.com and please choose me, Lynn Gauthier, as your Demonstrator.

As I am a Stampin' Up Demonstrator, I get to pre-order from the new 2017 Occasions Catalog. I've already received my pre-order from the new 2017 Occasions Catalog and my free items from the Sale-A-Bration Brochure. Sale-A-Bration runs from January 4 - March 31, 2017. During Sale-A-Bration, you get a free item of your choice from the Sale-A-Bration brochure for every $50 you spend (before shipping and tax).
My share for today is a Gift Card or Money Holder that I made. I was inspired by a Gift Card Holder that Claire Daily designed; but, I ended up making it with different dimensions and embellishments.
Let's take a look:

I love to make and decorate Tree's. There's so many different ways that it can be done.
You can get 3 Gift Card Holders out of one piece of 8-1/2" x 11" Cardstock. I took a piece of 8-1/2" x 11" Real Red Cardstock and trimmed it down to 8-1/2" x 9-3/4". With your 8-1/2" end at the top of your Stampin' Trimmer, cut at 2-7/8" twice. You will end up with three 2-7/8" pieces with one being just a smidgen wider. The 2-7/8" pieces will fit perfectly inside the Lots of Labels Framelits Dies to be able to partial die cut them.

Partial die cut one end with the Largest Lots of Labels Framelits Die. So, slip your cardstock into the center of your die just to the end of the die and partial die cut the end of your cardstock.

From the straight end of your Gift Holder Base (not the die cut end), score at 2-1/2" and 6-3/8".
I embossed just the straight end portion (2-1/2" section) with SU's Holly Emboss Folder. I also punched a semi circle from the embossed end with a 1-1/2" Circle Punch.
I trimmed out a piece of SU's Presents & Pinecones DSP at 2-12" x 3-1/4" and adhered it to the center section with Mono Multi Purpose Glue.
I also cut another piece of the DSP and partial die cut it for the first section (the flap). It measured 2-1/2" x 3" before partial die cutting it.
I adhered the two sides of the embossed section to the holder with 1/8" Sticky Tape.

You can put a Gift Card or Money into the pouch for a quick and easy gift.

For the Belly Band: I cut a piece of SU's 5/8" Burlap Ribbon and stapled it together in the front.
I punched out a Scalloped Circle with my SU 2-3/8" Scalloped Punch (Retired). You can use SU's Layering Circles Framelits dies or SU's new Stitched Shapes Framelits Dies to obtain a Circle if you don't have the 2-3/8" Scalloped Punch.
Using SU's Peaceful Pines Stamp Set, I stamped the Tree in Emerald Envy Ink onto Whisper White Cardstock.
Using SU's Perfect Pines Framelits Dies, I die cut out the Tree and adhered it to the Scalloped Circle with Mono Multi Purpose Glue.

Using SU's Confetti Stars Border Punch, I punched a lot of the Stars from SU's Gold Glimmer Paper and adhered them randomly to the tree with Mono Multi Purpose Glue.
Using SU's Banners for Christmas Stamp Set, I stamped Merry in Red Red Ink onto Emerald Envy Cardstock and die cut it out with an Oval die from SU's Stitched Shapes Framelits Dies.
I adhered a Gold Glimmer Star to each side of the Sentiment using Mono Multi Purpose Glue.
I tied a Bow from SU's Linen Thread and adhered it under the Sentiment with Mono Multi Purpose Glue.

I have a Sneak Peek from the new 2017 Occasions Catalog. I used the new Party Animal Designer Series Paper, Balloon Adventures Stamp Set, the Pop-Up Thinlits Dies. I also used the Balloon Bouquet Punch that's in the 2016-2017 Annual Catalog.

It's a bit on the busy side and I probably should have put Whisper White Cardstock behind the frame. It will be quite cheery though for my Niece, Amy, Birthday.

The entire Dapper Denim frame is one complete die from SU's new Balloon Pop-Up Thinlits dies. I stamped the balloons in Crushed Curry, Tangelo Twist and Dapper Denim Inks onto Whisper White Cardstock. I adhered them to the Balloons on the frame with Mono Multi Purpose Glue.

I stamped the Banner and the Sentiment and run it through my BIG Shot with the Balloon Pop-Up Frame Die and trimmed up the ends with my snips.
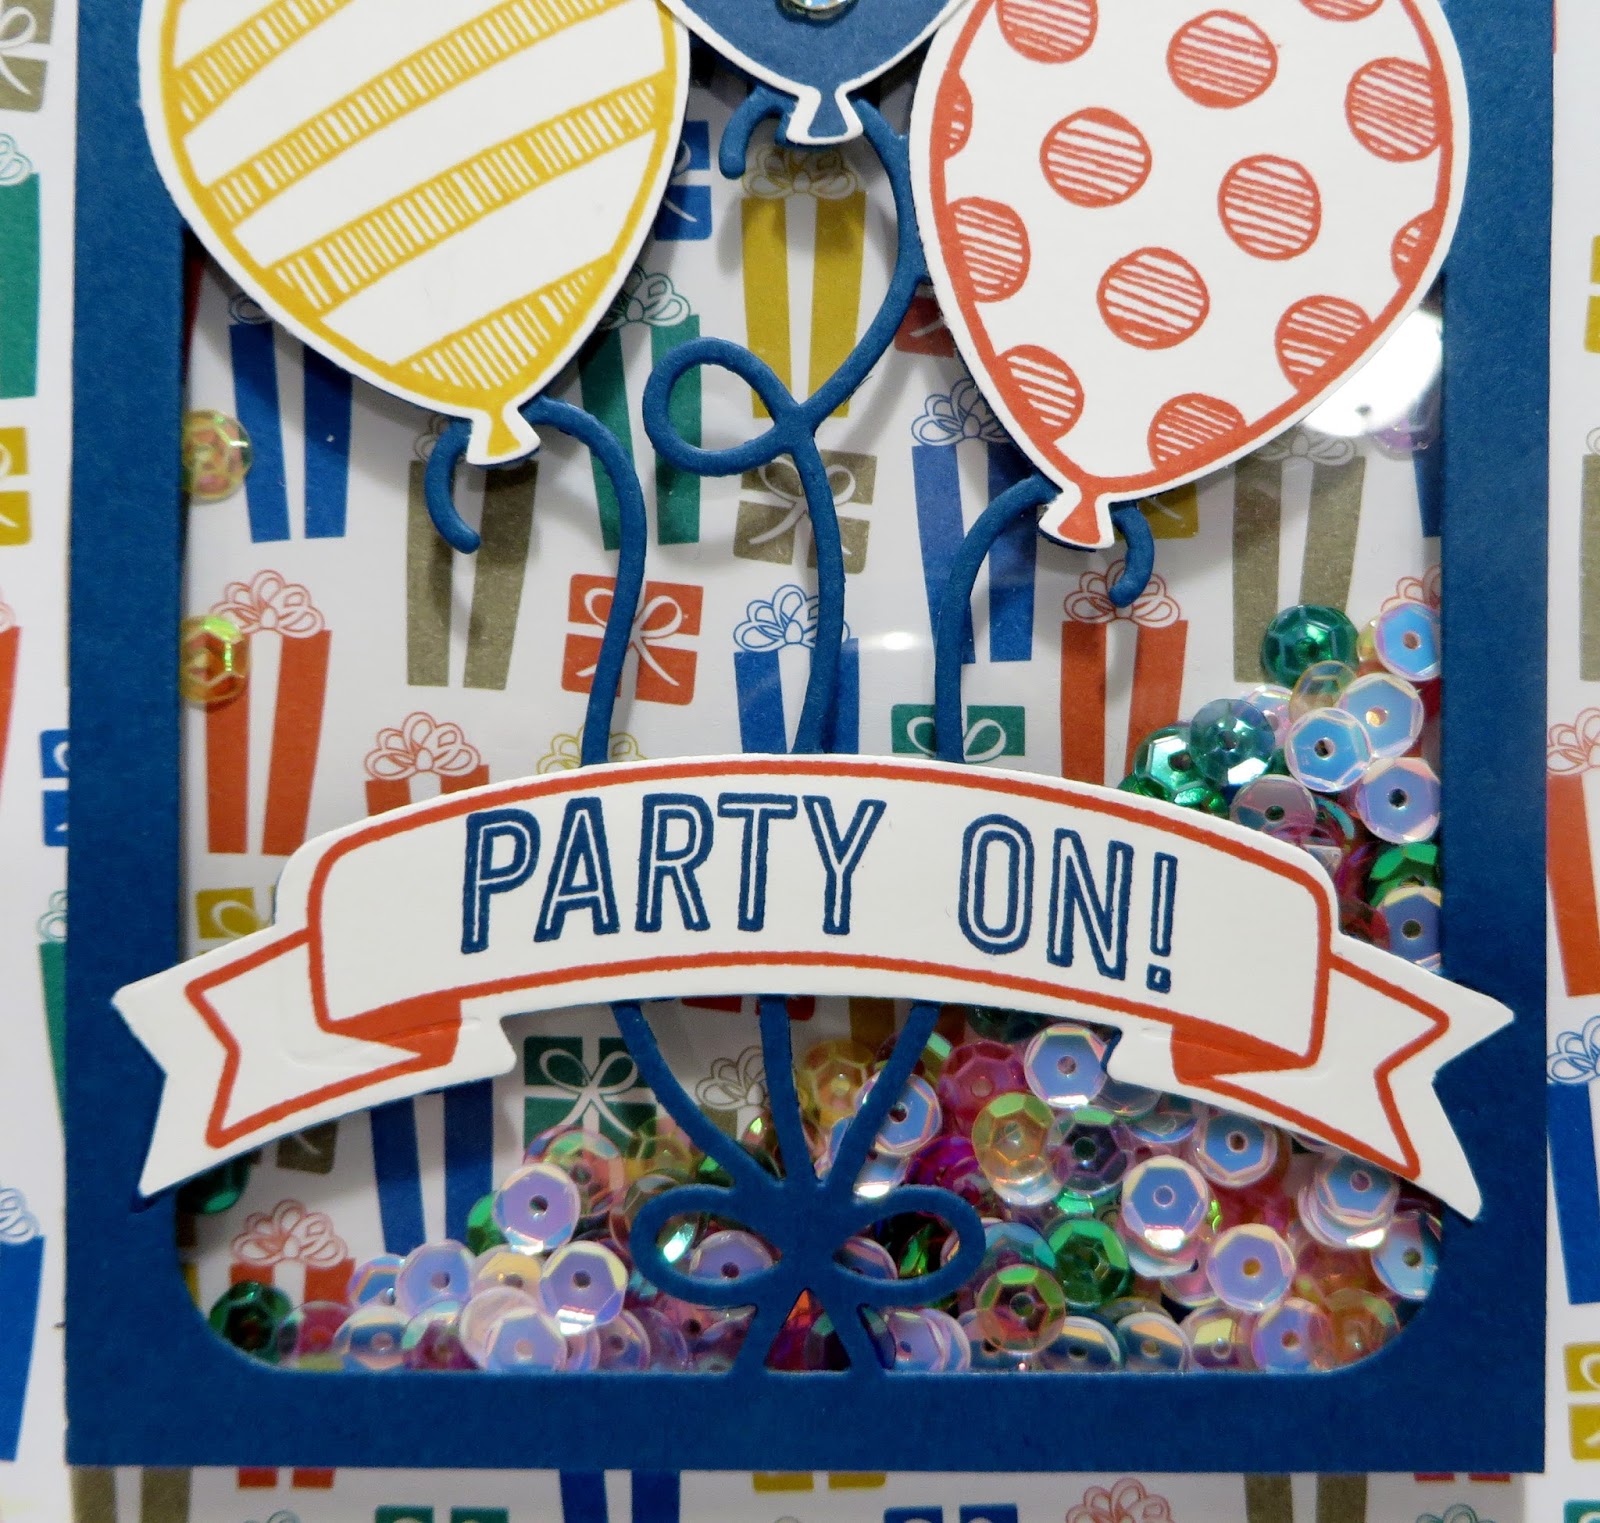
I made the card a shaker and used sequins from my own stash.

Here's the inside of my card...I used SU's Stitched Shapes Framelits Dies and stamped the Whisper White Circle in Tangelo Twist Ink with the Sentiment from SU's new Balloon Adventures Stamp Set.
I die cut the Bow from Dapper Denim Cardstock and put one of the Circles from die cutting a Balloon in the center of the Bow. You can see this in the next picture.

Use also get Balloon dies in the Balloon Pop-Up Thinlits Dies. They die cut out the Balloon and the Circles on one and the stripes on the other.
I made this Balloon Bouquet and put it on the front of the envelope for a cute embellishment.

I also adhered some sequins from my own stash to the solid Dapper Denim Balloon using my Fine Tip Glue Bottle.
That's all I have for today. Thanks for stopping by my blog!
If you would like to become a Paper Pumpkin Subscriber with me, Please click on the link below to sign up.
https://www.paperpumpkin.com/en-us/sign-up/?demoid=2124949
If you would like to visit my Pinterest Boards, Please click on the link below:
https://www.pinterest.com/dodge3670/https://www.pinterest.com/dodge3670/
If you are interested in purchasing Stampin' Up products, you can order from me on-line at www.stampinup.com and please choose me, Lynn Gauthier, as your Demonstrator.
PLEASE GIVE CREDIT WHERE CREDIT IS DUE!
I recently discovered that people are using my cards and/or projects, duplicating them and entering them into challenges, using them for their own card classes and (using them on their blogs as their own creations) - Please give credit where credit is due. My cards and projects are my own creations and are not to be used in challenges, blog hops, card classes or sold at craft shows; etc., for profit. I don't mind if you duplicate my creativity to pass on to family members or friends as gifts or Occasions cards; but, PLEASE be considerate of others creativity! Thank you!
This comment has been removed by a blog administrator.
ReplyDelete