Today, I have a series of Easter goodies for my blog posts this week. My Good Friend and Fellow Stampin' Up Demonstrator, Kadie, has her down line meeting next week and I offered to make the Door Prize for her group. Thought it would be nice to take some extra work off of her so she can enjoy more time creating Stampin' Up goodies and being with her Husband. She has such a busy schedule too!
Here's what I came up with:

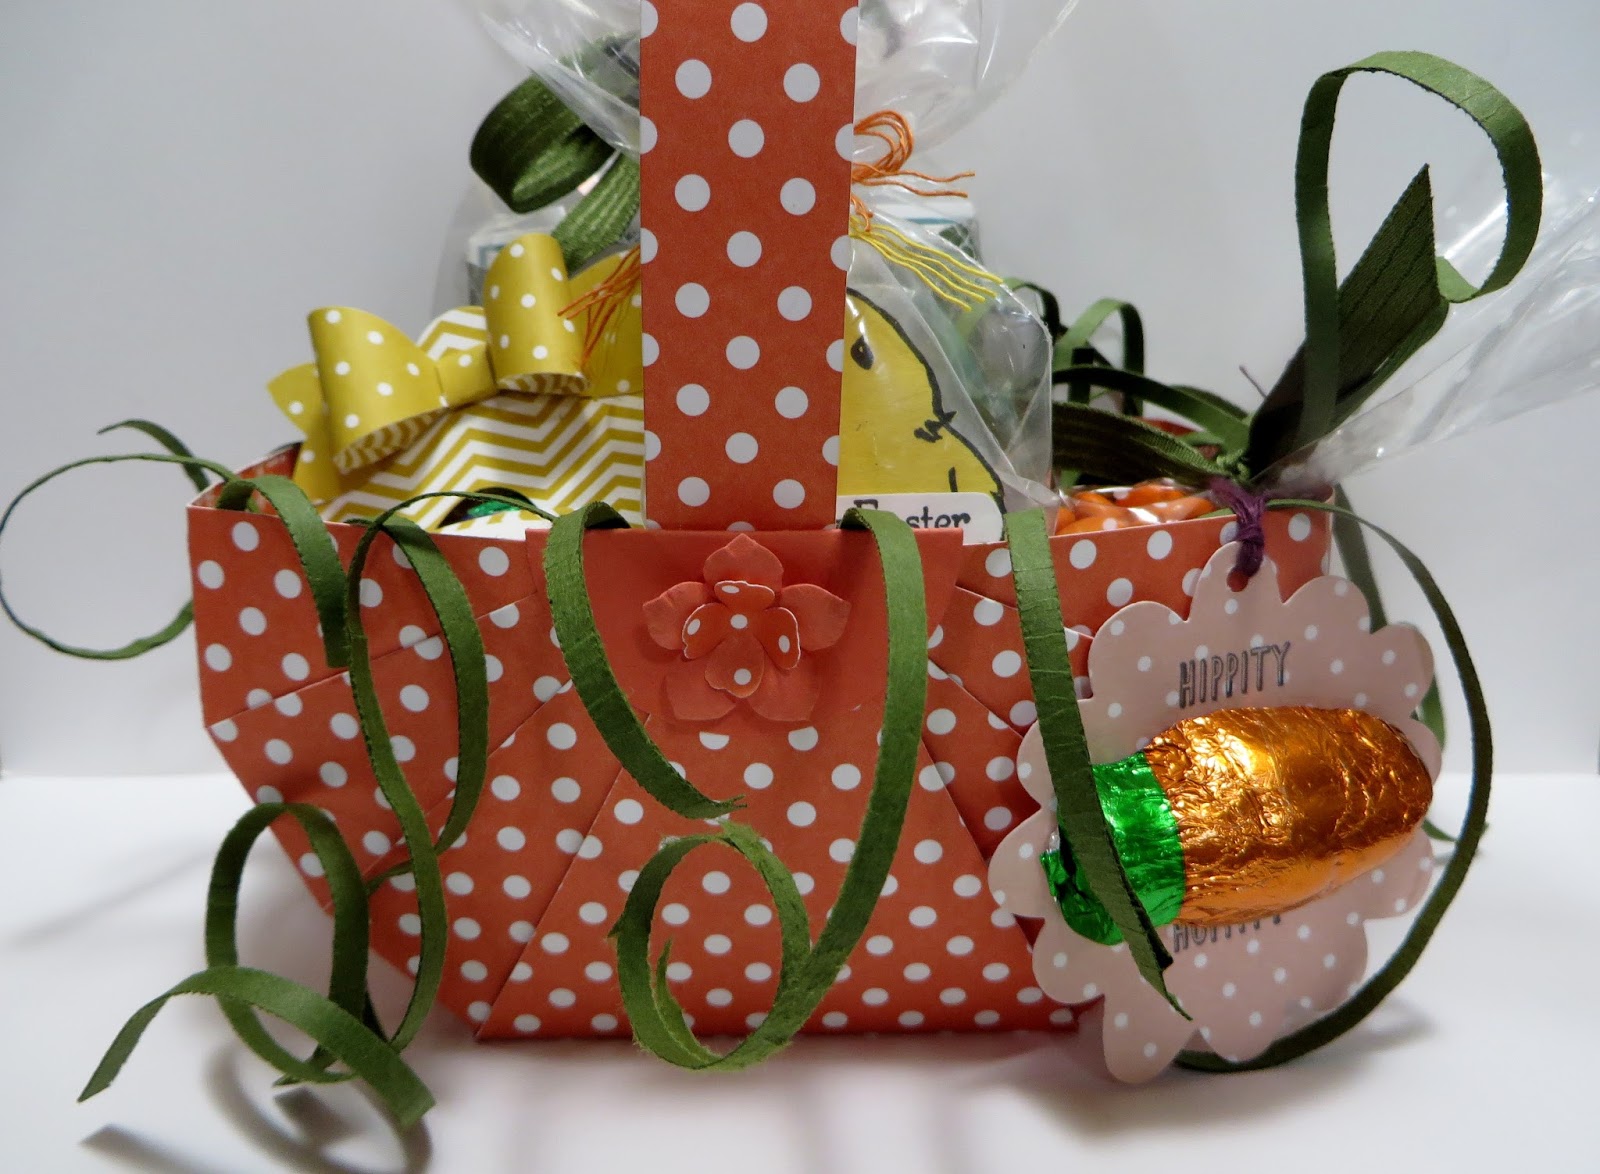
An Easter Basket full of goodies that I made with Stampin' Up products!
I LOVE this basket and I'll include my hand written instructions at the bottom of today's blog post. There are a lot of video's out there for this basket too; but, I just don't know the name for the basket. My hand written instructions aren't always the best either.
I think the basket full of goodies turned out awesome though!!!

I used Stampin' Up's Calypso Coral Designer Series Paper and Cardstock for the basket.

And, if I remember correctly, I used the 1-3/4" punch for the half folded circle to cover the strips where they meet in the top center of the basket where I attached the flowers on each side.
I used SU's Petite Petals Punch for the outer flower on the basket and the flower in SU's Itty Bitty Accents Punch Pack for the inner flower.
The above picture is a close up of the bottom side of the basket.
I'll be sharing blog posts all this week on all the Stampin' Up goodies I made inside the basket.

And, a picture from the top. I LOVE that little chick peeping out the side.

A picture of from the top right. Yum! Chocolate!

A picture from the top left. I think I see an egg in there and maybe a little lamb's face!

And, a picture of my water colored bunny tag. Isn't he just too cute!

So Sorry about these instructions (what a mess huh!). I'll explain more further down in my blog post.


Here is a picture of the smaller basket. I used SU's Blushing Bride Cardstock on this one.

Here is a picture of both baskets. The pink basket shows the alternating strips glued to the back of the triangle piece. The edges of the strips will be trimmed off level with the side of the basket, covered with the circle folded over the edges and a flower adhered to the half circle.
The template was in centimeters so I converted it to over our U.S. measurements.
The smaller basket is 6" x 6" Cardstock. See the picture of the pink cardstock template and picture it as being 9 - 2" squares.
So, you score your 6" x 6" Cardstock at 2" and 4", turn, and score again at 2" and 4". Now you have your 9 - 2" sections.
The first row across would be a 2" strips square, a 2" triangle square, and a 2" strips square.
The middle row across would be 3 - 2" squares.
The bottom row across would be a 2" strips square, a 2" triangle square, and a 2" strips square.
So, your first 2" square (top left) is cut in 3 strips; each strip measures 5/8" for a total of 2" (give or take a smidge).
Your next 2" square (top center) is divided in half at the top with a 1" center point and cut down on an angle on each side of center point to each corner of the square.
Your next 2" square (top right) is cut the same as the first square.
You do nothing with the 3 center row squares.
Your bottom row of 2" squares is cut the same as the top 3 squares.
Score, Cut and Fold as in the Pink Cardstock template.
Adhere each strip by alternating them behind the triangle cut square. This will form your sides of the basket and make it look like the bottom of a basket. Repeat on other side.
I trimmed off the excess edges of the strips even with the baskets edge.
I used SU's 1-3/8" Circle punch scored in half and adhered it over the glued strips edges to hide all the strip edges.
I adhered my flowers to the half circles on each side of the basket.
I adhered a handle to my basket that measures 10" x 5/8". If you are putting something heavy in the basket, I would recommend that you double the thickness of your handle by adhering two pieces of Cardstock together and then adhering it to your basket.
Hope that makes sense. You can also increase or decrease the size of your squares in increments of three's like the Calypso Coral basket is 9" x 9" Cardstock.
For the 9" x 9" Cardstock, your squares will be in 3" increments:
So, you score your 9" x 9" Cardstock at 3" and 6", turn, and score again at 3" and 6". Now you have your 9 - 3" sections.
So, your first 3" square (top left) is cut in 3 strips; each strip measures 1" for a total of 3" (give or take a smidge).
Your
next 3" square (top center) is divided in half at the top with a 1-1/2"
center point and cut down on an angle on each side of center point to
each corner of the square.
Your next 3" square (top right) is cut the same as the first square.
You do nothing with the 3 center row squares.
I used the 1-3/4" Circle punch scored in half and adhered it over the glued strips edges to hide all the strip edges.
I adhered a handle to my basket that measures 12" x 1". If you are putting something heavy in the basket, I would recommend that you double the thickness of your handle by adhering two pieces of Cardstock together and then adhering it to your basket.
I have not tried the 12" x 12" Cardstock; but, that would make your squares 4". So, you can add or subtract from the size of your squares to make smaller or bigger baskets.
Sorry for the long posts; it's really hard to put all of this in writing so that it makes sense, which I hope it does for you and I hope you give it a try!
Thanks for stopping by today. Hope you can come back the rest of this week to see all the goodies inside the basket. Have a good day!
I recently discovered that people are using my cards and/or projects, duplicating them and entering them into challenges. My cards and projects are my own creations and are not to be used in challenges or sold at craft shows; etc., for profit. I don't mind if you duplicate my creativity to pass on to family members or friends as gifts or Occasions cards; but, Please be considerate of others creativity! Thank you!
If you are interested in purchasing Stampin' Up products, you can order from me on-line at www.stampinup.com and please choose me, Lynn Gauthier, as your Demonstrator.
This is my first blog and it is still under construction. I have yet to receive my Watermark so the picture's are copyright Lynn A. Gauthier, 2015-2016 Stampin' Up.
This basket is WAY CUTIER in person!
ReplyDeleteThank you Lynn for creating this awesome door prize for our downline meeting......My fingers are crossed that I'll win it!