My e-mail is still down too! I keep getting a Robot with one eye hanging out on spring. My Hubby says it looks like me with my bad eye! Ha! Ha! 😊😊😊
My share for today is 2 more Cards that go along with my Matchbook Gum Holder Projects that I shared with you yesterday. Let's take a look:


Pictured above are the two Matchbook Gum Holder Projects that I shared with you on my blog yesterday.


And, pictured above are the two cards that I made to go with my Matchbook Gum Holders.
My Card Base's are Crumb Cake and Early Espresso Cardstocks cut at 5" x 7" and scored and folded at 3-1/2" for a side opening 3-1/2" x 5" Card.
My Card Front Panel's are from Stampin' Up's Coffee Break Designer Series Paper cut at
3" x 4-1/2" and adhered to my Card Base's with Mono Multi Purpose Glue.
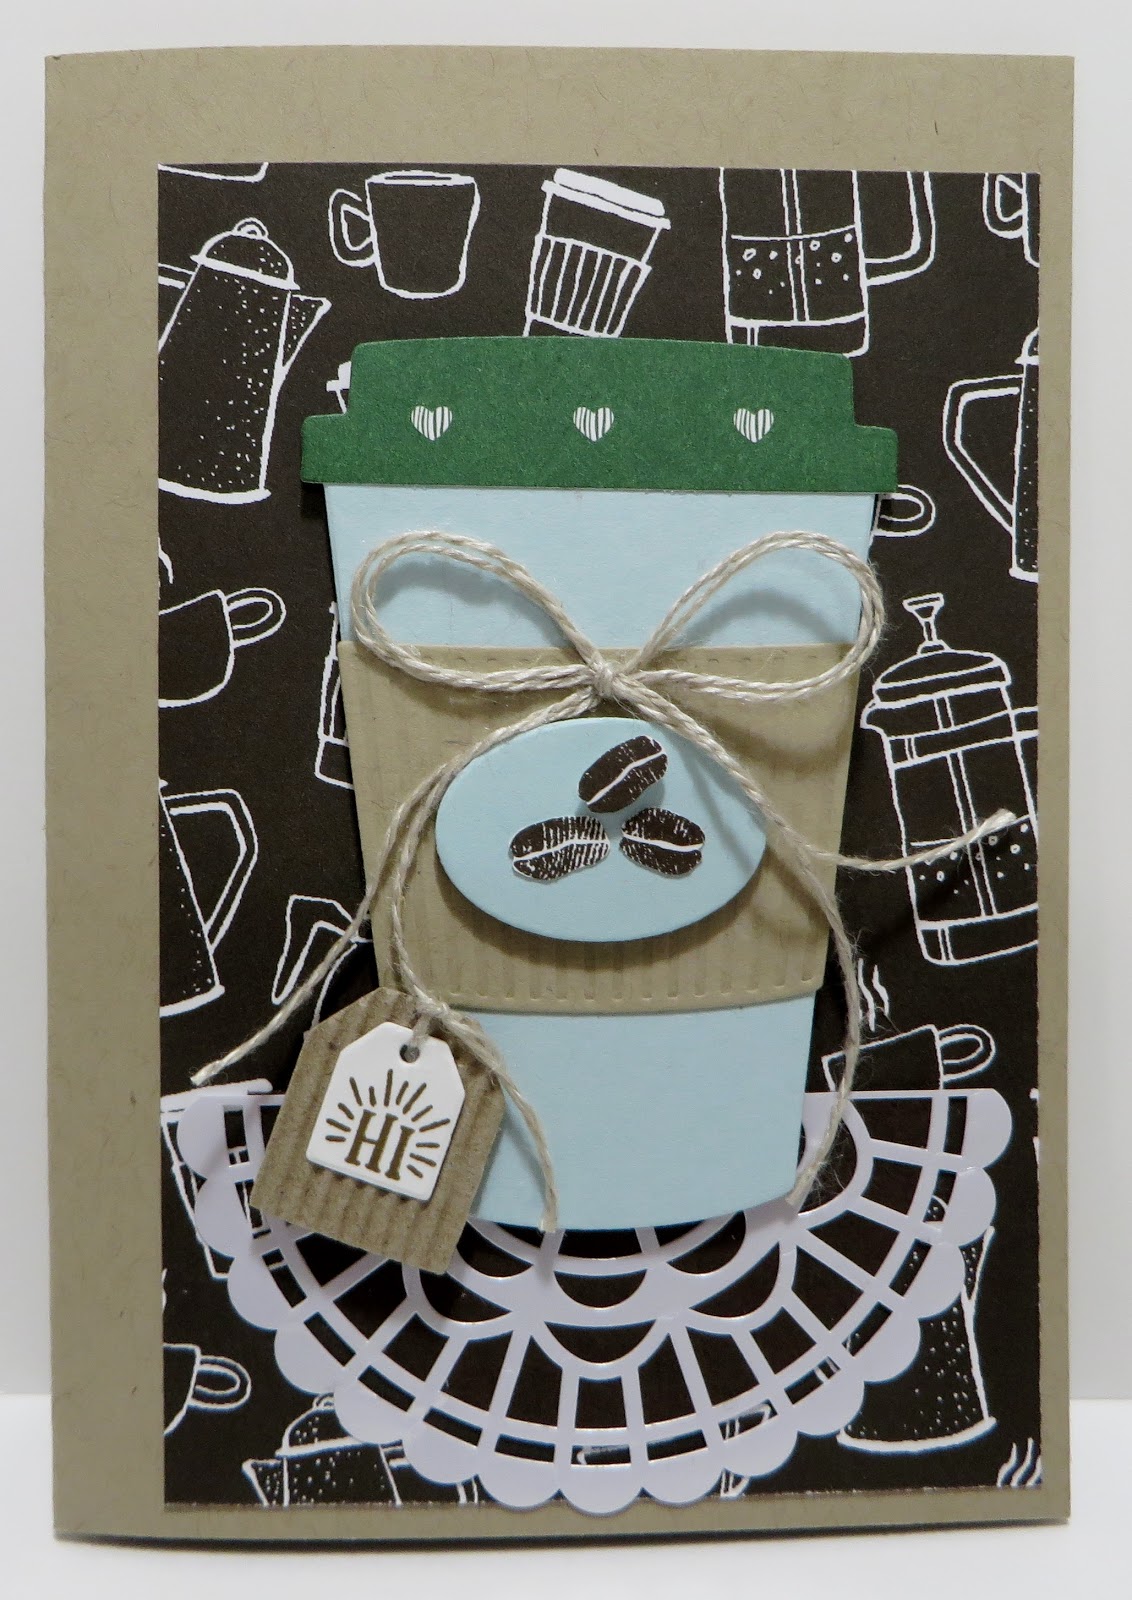
Weeeeee...there's a 2018-2019 Annual Catalog Sneak Peek in my Cards today. Can you guess what it is??? It's half of one of Stampin' Up's new Pearlized Doilies on each Card. The Doilies have a real nice sheen to them and are thicker or more sturdy than the delicate doilies.

Using SU's 2-1/4" Circle Framelit Die, I die cut a Circle from Early Espresso Cardstock and trimmed it in half on my SU Trimmer. I hand cut one of the new Pearlized Doilies in half and adhered it to the Early Espresso half Circle for my table cloth and to my Card with Mono Multi Purpose Glue.

Using SU's Coffee Cups Framelits Dies, I die cut out the Tall Cup and Small Oval from Soft Sky Cardstock, the Lid from SU's Coffee Break Designer's Series Paper and the Coffee Cup Wrap from Crumb Cake Cardstock.
I adhered my Coffee Cup together as shown in the picture above with Mono Multi Purpose Glue. I adhered the Small Oval to the Wrap with Stampin' Dimensionals.
I fussy cut out 3 of the Coffee Beans from the DSP and adhered 2 Beans to my Small Oval with Mono Multi Purpose Glue and 1 Bean with a small piece of Stampin' Dimensionals.
Using SU's Coffee Cafe Stamp Set, I stamped my Hi in Soft Suede Ink onto Whisper White Cardstock, die cut the Tag out and adhered it to a Tag from SU's Corrugated Elements Embellishments with Mono Multi Purpose Glue.
I cut a LONG length of SU's Linen Thread, tied it into a Double Bow and adhered it above the Oval with Mono Multi Purpose Glue. I thread the other long end through the Tag and tied it with a Double Knot. I adhered the Tag to the Cup with a Mini Stampin' Dimensional.

Using SU's Stitched Shapes Framelits Dies, I die cut out a 2-7/8" Stitched Circle from Early Espresso Cardstock and adhered it to the inside of my Card with Mono Multi Purpose Glue.
Using SU's Coffee Cups Framelits Dies, I die cut out a Short Cup from Soft Sky Cardstock and a Lid from SU's Coffee Break DSP. I adhered the Lid to the Coffee Cup with Mono Multi Purpose Glue.
Using SU's Coffee Cafe Stamp Set, I stamped Hi in Early Espresso Ink onto the Short Cup 5 times as shown in the picture above.
I fussy cut out 5 Beans from SU's Coffee Break DSP and adhered them to the Cup with Mono Multi Purpose Glue as shown in the picture above. (Ha...I made my own DSP!!!)
For my Second Card:
Using SU's 2-1/4" Circle Framelit Die, I die cut a Circle from Soft Sky Cardstock and trimmed it in half on my SU Trimmer. I adhered the other half of my new Pearlized Doiliy to the Soft Sky half Circle for my table cloth and to my Card with Mono Multi Purpose Glue.
I die cut the Tall Cup and the Lid from Coffee Break DSP and the Small Oval from Garden Green Cardstock.
I adhered the Cup together with Mono Multi Purpose Glue and the Beans and Oval with Stampin' Dimensionals.

I stamped my Hi in Garden Green Ink and the Beans in Soft Suede Ink and die cut them out.
I cut a LONG length of SU's Linen Thread, tied it in a Bow and adhered it to the Cup with Mono Multi Purpose Glue as shown in the picture above. I thread the other long end through the Tag and tied it with a Double Knot. I adhered the Tag to the Cup with a Mini Stampin' Dimensional.

Using SU's Stitched Shapes Framelits Dies, I die cut out the 2-3/8" x 3-1/4" Stitched Oval from Soft Sky Cardstock and adhered it to the inside of my Card with Mono Multi Purpose Glue.
I die cut the Short Cup from Coffee Break DSP, the Lid and the Wrap from Whisper White Cardstock.
I stamped my Sentiment in Soft Suede Ink onto the Wrap and adhered my Cup together with Mono Multi Purpose Glue.

I stamped my Beans in Soft Suede Ink, die cut them out and adhered them to the top of my Cup with Mono Multi Purpose Glue.

I hope you can come back tomorrow when I'll share two more Matchbook/Card designs.
These Matchbooks and Cards sure make for some excellent gifts!!!
Again, I hope I got everything posted correctly as it is still so hard with a Boo Boo eye!
Blessings!
Lynn

Go to www.stampinup.com to see the Retiring List.

In order to keep bringing you the most current and on trend colors, Stampin' Up! decided it was time to give their color collections a makeover.
With this revamp, you’ll not only have new products, but also have a new variety of shades that will inspire creativity and allow you to explore more sides of your crafting.
There are still four color collections, each with ten colors. There is also a new color group called Basics.
.
In order to keep their color collections to exclusive Stampin’ Up! colors, they moved Basic Black, Very Vanilla, and Whisper White out of the Neutrals collection and also moved a few colors into the Neutrals collection, making it more exciting and colorful!
Some additional colors have changed collections as well—you’ll notice this as you look through the new collections in the 2018-2019 Annual Catalog. These changes were based on needing to maintain color balance in our updated collections.
In addition to new colors, they also redesigned their ink pads. The case is a new, more intuitive design and they’ve improved the formula of the ink, as well! We think you will love these changes.
As a Stampin' Up! Demonstrator, I was able to order the new In-Color Ink Pads and I just LOVE the new design. Stampin' Up! never ceases to amaze me!
Paper Pumpkin Promotion
 Stampin'
Up! is offering new subscribers 50% off their first 2 months with their
Creativity Starts with Paper Pumpkin promotion when you sign up by May
10. You get an amazing subscription price for two straight months.
Stampin'
Up! is offering new subscribers 50% off their first 2 months with their
Creativity Starts with Paper Pumpkin promotion when you sign up by May
10. You get an amazing subscription price for two straight months.- Promotion is for new subscribers only
- Offer is available March 11–May 10, 2018
- Offer runs for 2 months
- Use code SAVEFIFTY0418 at checkout
- Discount is applied to one kit per month for the first two month of a new subscription.
- How it works: You can subscribe during April’s subscription period from March 11–April 10 or May’s subscription period from April 11–May 10 and receive the discount. If you subscribe during April’s subscription period you will receive 50% off your subscription when billed in April and May. If you subscribe during May’s subscription period you will receive 50% off your subscription when billed in May and June. If you suspend during your 2-month discount period, you will receive your discount during the first 2 months in which you reactivate.
- Does not apply to prepaid codes
Occasions Catalog 2018!
January 3 - May 31, 2018
Here's the link to the 2018 Occasions Catalog:
https://www.stampinup.com/ECWeb/CategoryPage.aspx?categoryid=100300
Clearance Rack
Here's a link to SU's Clearance Rack:
https://www.stampinup.com/ECWeb/ItemList.aspx?categoryid=100100
If you are interested in purchasing Stampin' Up products, you can order from me on-line at www.stampinup.com and please choose me, Lynn Gauthier, as your Demonstrator.
If you would like to visit my Pinterest Boards, Please click on the link below:
Here
If you would like to become a Paper Pumpkin Subscriber with me, Please click on the link below to sign up.
Here
PLEASE GIVE CREDIT WHERE CREDIT IS DUE!
I recently discovered that people are using my cards and/or projects, duplicating them and entering them into challenges, using them for their own card classes and (using them on their blogs as their own creations) - Please give credit where credit is due. My cards and projects are my own creations and are not to be used in challenges, blog hops, card classes or sold at craft shows; etc., for profit. I don't mind if you duplicate my creativity to pass on to family members or friends as gifts or Occasions cards; but, PLEASE be considerate of others creativity! Thank you!
No comments:
Post a Comment