It's been cloudy and gloomy out all morning. We are to expect scattered showers and cloudy conditions all the way through Sunday. So, it will be a good weekend to make some cards and projects!!! 😊😊😊
My share for today is an Alternate Petite Treat Project that I made using the Broadway Star Kit and Stampin' Up's new Petite Treats Framelits Dies. Let's take a look:
Today, I'd like to share with you how to use SU's new Petite Treats Framelits Dies and then next Monday I'll share with you how I embellished these darling Petite Treats!!!
These little Sour Cream Projects are so fun to make and embellish and are very, very and very addicting to create.
Pictured above are SU's new Petite Treat Framelits Dies.
The Large Rectangle die makes the Body of the Petite Treat.
The 3 Snap In dies in the middle of the Rectangle die are for the Top of the Body of the Petite Treat. You just insert one of the 3 dies (Round, Heart or Straight) to create the top for the Petite Treat.
The 2 Scalloped dies create a Fancy, Scalloped Lace for the bottom of the Body of the Petite Treat.
The last die is a Tag for your Sentiment. So, you would stamp your Sentiment and then die cut it out and adhere it or tie it to your Petite Treat.
I am demonstrating the Petite Treat on Stampin' Up's new Lovely Lipstick Cardstock as it shows up so well in pictures.
I trimmed out a panel of Lovely Lipstick Cardstock to measure 5-1/4" x 5-3/4".
Using the Large Rectangle Die with the Double Loop Die (Heart) inserted in the Rectangle, I ran the panel and dies through my BIG Shot.
Pictured above is the Back Side of the panel after it has been die cut. I adhered SU's Tear & Tape Adhesive to the Top, Bottom and Right Side of the Back of the panel.
Sorry my picture is blurry. I'm not sure what happened!!!
Anyways, I removed the backing from the Tear & Tape on the Right Side of the panel and rolled it up into a cylinder while adhering the 2 sides together.
(Note: I used my SU Bone Folder and lightly gave the panel a curl so it made it easier to roll up into a cylinder.)
(Note: Press the tape down really well with your fingers or with a Bone Folder before rolling into a cylinder.)
I removed the backing from the Tear & Tape on the Top of the Petite Treat Holder and adhered the Top closed as shown in the picture above.
(Note:
The 2 Short Legs coming down from each of the 3 insert dies make a
short 'tick mark' where the Body of the Petite Treat is to be folded.)
So, there is a 'tick mark' on each side of the Double Loop (Heart) to show you where to fold it flat as shown in the picture above.
Next, I put my chocolate treats inside the Petite Treat Holder, removed the backing from the Tear & Tape on the Bottom of the Petite Treat Holder and folded the Bottom closed where the 'tick marks' were made when die cutting the Holder.
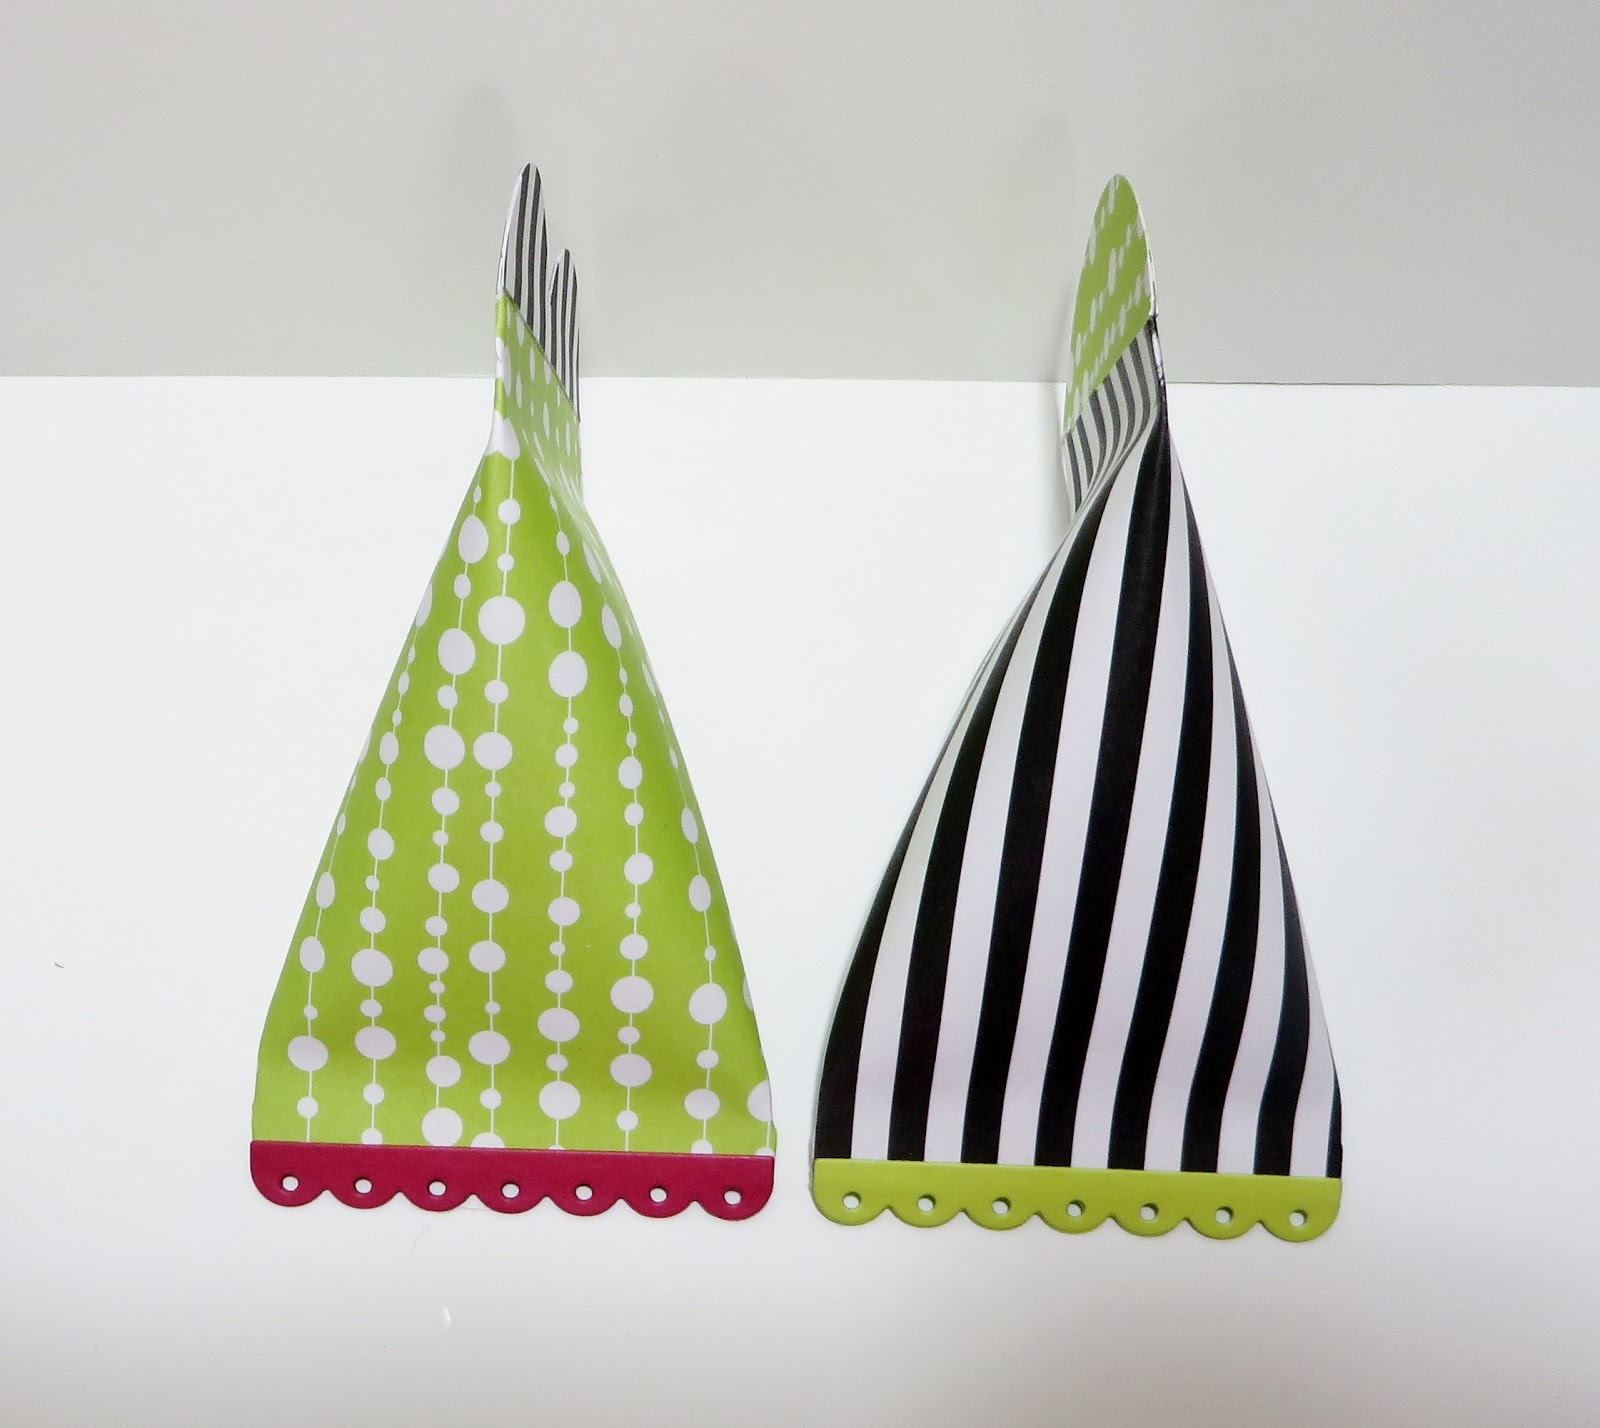
Pictured above are 2 Petite Treats that I made by die cutting the Card Bases in SU's Broadway Star June 2018 Paper Pumpkin Kit.
I die cut 2 each of the Scalloped Lace dies from Lovely Lipstick and Lemon Lime Twist Cardstock and adhered one to each side on the Bottom of the Petite Treats with Mono Multi Purpose Glue.
For the Petite Treat shown on the left in the picture above, I die cut the Double Loop (Heart) die twice from the Black/White Striped Card Base and adhered one to each side of the top of the Holder. For the one on the right, I die cut the Single Loop die twice from the White Circle Banners/Lemon Lime Twist Card Base from the Kit.
I adhered one to the front and one to the back of each of the Petite Treats.
I hope that you can come back on Monday to see how I embellished my Petite Treats.
Wishing you all a warm and sunny day!!!
Blessings!
Lynn
2018-2019 Annual Catalog
June 1, 2018
ORDERING DOWNTIME:
Ordering will be unavailable from midnight to noon (MT) while SU
transitions their systems to the new 2018-2019 Annual catalog. Ordering will be restored no
later than noon (MT).
If you are
interested in purchasing Stampin' Up products, you can order from me
on-line at
https://www.stampinup.com/ecweb/default.aspxand
please choose me, Lynn Gauthier, as
your Demonstrator.
Clearance Rack
Here's a link to SU's Clearance Rack:
https://www.stampinup.com/ECWeb/ItemList.aspx?categoryid=100100
If you are
interested in purchasing Stampin' Up products, you can order from me
on-line at www.stampinup.com and please choose me, Lynn Gauthier, as
your Demonstrator.
If you would like to visit my Pinterest Boards, Please click on the link below:
Here
If you would like to become a Paper Pumpkin Subscriber with me, Please click on the link below to sign up.
Here
PLEASE GIVE CREDIT WHERE CREDIT IS DUE!
I
recently discovered that people are using my cards and/or projects,
duplicating them and entering them into challenges, using them for their
own card classes and (using them on their blogs as their own creations) -
Please give credit where credit is due. My cards and
projects are my own creations and are not to be used in challenges, blog
hops, card classes or
sold at craft shows; etc., for profit. I don't mind if you duplicate my
creativity to pass on to family members or friends as gifts or Occasions
cards; but, PLEASE be considerate of others creativity! Thank you!
I've updated my blog post from yesterday with all the schematics for the Gift Card Holder Project. Enjoy!
It's a really nice afternoon with lots of sun and some clouds. It sprinkled a little bit this morning and the rain has moved out. Our high temperature is supposed to be in the middle 70's AND...NO Humidity. Ahhhhhh...I can breath so much better! My allergies have been off the charts and the pollen is washed off the trees and there is yellow everywhere! YIKES!!!
Sorry I'm so late today! My Hubby had a very, very long eye appt. with 2 different Dr.'s in Saginaw this morning. He has to have Glaucoma and Cataract surgery some time in July. I tell ya', if it's not one thing, it's another!!! I'm hoping the surgery will help him out with the pressure and vision in his eye!!!
My share for today is a Gift Card Holder that I made using Stampin' Up's June 2018 Broadway Star Paper Pumpkin Kit. Let's take a look:
I just LOVE to make Alternate Cards and Projects with Stampin' Up's Paper Pumpkin Kits. So fun and I LOVE the challenge!!!
I took one of the Pre-Printed Envelopes from the Kit and cut the Flap straight down the center at 2-7/8". I sealed the left side down and folded the Envelope in half. See my picture above which is one of SU's plain envelopes that I keep on hand for my template.
Pictured above is the front of my Gift Card Holder.
I used Layering Ovals Framelits Dies on the Front of my Gift Card Holder.
I used the 2-1/8" x 3" Oval and die cut it from Whisper White Cardstock.
I used the 2-1/2" x 3-1/2" Oval and die cut it from Lovely Lipstick Cardstock.
Using SU's Broadway Star Stamp Set, I stamped the Stars onto the Whisper White Oval with Lovely Lipstick Ink.
I cut a long length of the Black/Gold Twine from the Kit and adhered it to the Front of the Gift Card Holder with Fast Fuse Tape (Retired) under where the Oval would be adhered so once the Oval is adhered, you cannot see the Tape.
I adhered both Ovals together with Mono Multi Purpose Glue and adhered them to my Gift Card Holder with Stampin' Dimensionals.
I adhered the Cake Die Cut with Stampin' Dimensionals and adhered one of the Candle Stickers to the top of the Cake.
I adhered 3 of the Self Adhesive Gold Sequins and 3 Pearls from the Kit randomly as shown in the picture above.
Above is a picture of the inside of my Gift Card Holder.
For the Left Side:
I trimmed out a panel from the the Black/White Striped Card Base in the Kit to measure 2-5/8" x 3-1/2" and adhered it to the Left Side with Mono Multi Purpose Glue.
Using SU's Treehouse Adventure Stamp Set, I stamped Happy Birthday onto Lovely Lipstick Cardstock, punched it out with the Tailored Tag Punch and adhered the Tag with Mono Multi Purpose Glue.
I adhered 3 Candle Stickers and 3 Balloon Stickers from the Kit as shown in the picture above.
For the Right Side:
I trimmed out 2 panels of SU's Lemon Lime Twist Cardstock to measure 2-3/16" x 2-5/8".
Using SU's new Tufted Embossing Folder, I ran the panels through my BIG Shot. (Note: I sprayed the Tufted Embossing Folder lightly with water in a SU Stampin' Spritzer so the paper would not tear or crack.)
I adhered one panel to the front side of the Flap, trimmed off any excess White of the Flap that overhangs and adhered the second panel to the other side of the Flap with Mono Multi Purpose Glue.
I adhered one of the Cake Die Cuts from the Kit partially onto the Flap with Mono Mutli Purpose Glue as shown in the picture above.
I adhered half of a Velcro Dot to the underside of the Cake Die Cut. I then adhered the second half of the Velcro Dot to the first half and folded the Flap down to adhere the second half of the Velcro Dot to the Gift Card Holder. (This way, it makes for easy and more accurate positioning of the Velcro Dot sections.)
I took one of the Lemon Lime Twist Pre-Printed Banner Stickers from the Kit and cut around the Banner leaving the backing on the Sticker.
I trimmed the Banner Sticker down to measure 2-3/8" x 4-1/8" (4-1/8" is measured from the top of Banner to the end of the Point.)
I adhered two SU Glue Dots to the back of my Gift Card and then adhered the Gift Card to my Banner and slid it into the pocket on the Right Side.
The last thing to do was to tie the ends of the Black/Gold Twine into a Bow.
This was such a fun Gift Card Holder Project. I LOVE to embellish the inside and out.
Wishing you all a warm and sunny day!!!
Blessings!
Lynn
2018-2019 Annual Catalog
June 1, 2018
ORDERING DOWNTIME:
Ordering will be unavailable from midnight to noon (MT) while SU
transitions their systems to the new 2018-2019 Annual catalog. Ordering will be restored no
later than noon (MT).
If you are
interested in purchasing Stampin' Up products, you can order from me
on-line at
https://www.stampinup.com/ecweb/default.aspxand
please choose me, Lynn Gauthier, as
your Demonstrator.
Clearance Rack
Here's a link to SU's Clearance Rack:
https://www.stampinup.com/ECWeb/ItemList.aspx?categoryid=100100
If you are
interested in purchasing Stampin' Up products, you can order from me
on-line at www.stampinup.com and please choose me, Lynn Gauthier, as
your Demonstrator.
If you would like to visit my Pinterest Boards, Please click on the link below:
Here
If you would like to become a Paper Pumpkin Subscriber with me, Please click on the link below to sign up.
Here
PLEASE GIVE CREDIT WHERE CREDIT IS DUE!
I
recently discovered that people are using my cards and/or projects,
duplicating them and entering them into challenges, using them for their
own card classes and (using them on their blogs as their own creations) -
Please give credit where credit is due. My cards and
projects are my own creations and are not to be used in challenges, blog
hops, card classes or
sold at craft shows; etc., for profit. I don't mind if you duplicate my
creativity to pass on to family members or friends as gifts or Occasions
cards; but, PLEASE be considerate of others creativity! Thank you!