My share for today is a few Tag/Ornament Box Holders that I made from Envelopes on the Envelope Punch Board. Stampin' Up shared a video with us some time ago on how to make these Envelope Holders.
The Stampin' Up products that I used are Candy Cane Lane & This Christmas Designer Series Papers and the Envelope Punch Board.
Let's take a look at my Tag/Ornament Envelope Box Holder:
Cute huh! I posted my Reindeer Tags/Ornaments a couple days ago on my blog! If you missed them, or want to see them again or learn how to make them, click on the link below:
http://lynnslocker.blogspot.com/2016/11/stampin-up-candy-cane-lane-oh-what-fun.html
I used Stampin' Up's Candy Cane Lane Designer Series Paper. You can get 4 Tag/Ornament Holders out of one 12" x 12" piece of DSP. I cut my paper at 6" x 6" and made a 3" x 4" Envelope which I made into a Holder that measures 2-3/4" wide and 1-3/8" deep. Perfect for Tags and Ornaments.
I used SU's 3/8" Silver Glitter Ribbon for my Belly Band. The Glitter Ribbon comes in a combo pack. The other color of glitter ribbon is Sweet Sugarplum and it is such a pretty color!!!
Once I had my Silver Glitter Ribbon Belly Band tied onto my Tag/Ornament Envelope Holder, I slipped one of SU's Christmas Trinkets Embellishments onto a piece of Candy Cane Lane Real Red Baker's Twine and tied it into a bow around the Glitter Ribbon.
SU's Christmas Trinkets Embellishments has 24 antiqued silver embellishments, 8 of each design which is a Holly Leaf like I used in my project, a cute little Gingerbread Man and two Bells with a small Holly Leaf at the top.
SU's Candy Cane Lane Baker's Twine comes in a combo pack also. The colors are Real Red and Whisper White with Red Metallic thread.
Here is a picture of the Envelope Box Holder empty.
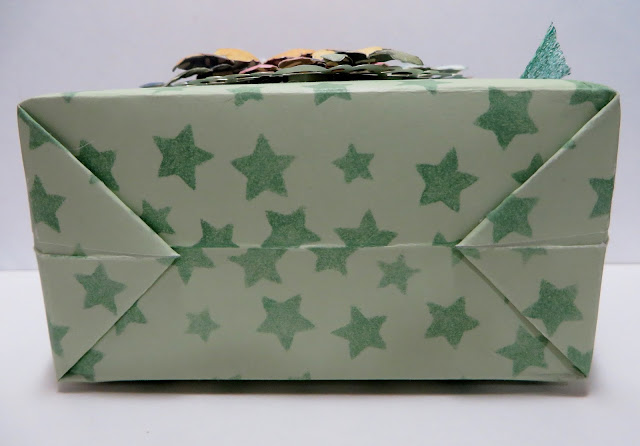
Here is the first one that I made some time ago. This was made from an envelope from one of SU's Paper Pumpkin kits. I used SU's Star Mask and sponged Mint Macaron Ink onto the stars.
I did a flower collage on the front and used a Gold Foil Heart Doily (Retired) and some Pool Party Glitter Ribbon (Retired) for a Belly Band.
I used SU's Basic Jewel Rhinestones in the centers of the flowers.
Here's a picture of the inside of the Holder. You can fold the flap down inside the Holder or backwards to the back of the Holder or just leave it standing straight up. This was a larger envelope so you can actually put a baggie of candy or cookies inside of it.
All I did to make the Holder was to take an envelope or make your own envelope on the Envelope Punch Board, score all 3 sides (left, right and bottom - not the top) at 3/4" in from each side. Sorry about the bad picture. I tried white on black and my camera did not like it at all. I really thought it would show up better!
Then, the fun part begins. Stick one hand inside the envelope to kind of pop it open and with the other hand work each side inward to the bottom 3/4" score line until you have a flat side. Fold the two triangle pieces to the bottom and adhere with Tear & Tape. You can now decide if you want the flap portion to fold down inside the Holder or fold it backwards to the back or just leave it straight up.
When using striped Designer Series Paper, first think about which way your stripes will line up. I've shown three examples with stripes: stripes up and down, stripes sideways and stripes on an angle (see picture below).
This is one of the larger Holders that I made with SU's This Christmas Designer Series Paper on the Envelope Punch Board.
This is a picture of the back of the holder. I folded the envelope flap backwards. I really like how the stripes are going on an angle.
This is really a quick and easy project. There's also so many opportunities to use this Holder: I can see lot's of different Christmas gifts inside.
I hope I inspired you to use an Envelope Punch Board. They are so much fun and there are so many opportunities!!!
That's all I have for today. Thanks for stopping by my blog!
PLEASE GIVE CREDIT WHERE CREDIT IS DUE!
I recently discovered that people are using my cards and/or projects, duplicating them and entering them into challenges, using them for their own card classes and (using them on their blogs as their own creations - Please give credit where credit is due. My cards and projects are my own creations and are not to be used in challenges, blog hops, card classes or sold at craft shows; etc., for profit. I don't mind if you duplicate my creativity to pass on to family members or friends as gifts or Occasions cards; but, PLEASE be considerate of others creativity! Thank you!
If you are interested in purchasing Stampin' Up products, you can order from me on-line at www.stampinup.com and please choose me, Lynn Gauthier, as your Demonstrator.


No comments:
Post a Comment