The Eastern Palace Suite Bundles went live Monday for all Customers to order. This is something new that Stampin' Up is offering all Customers. You can order on-line from me at www.stampinup.com and please chose me, Lynn Gauthier, as your Demonstrator.
Stampin' Up also restocked the Clearance Rack last week. There's some awesome, awesome deals. And, don't forget about the Retiring List of Products.
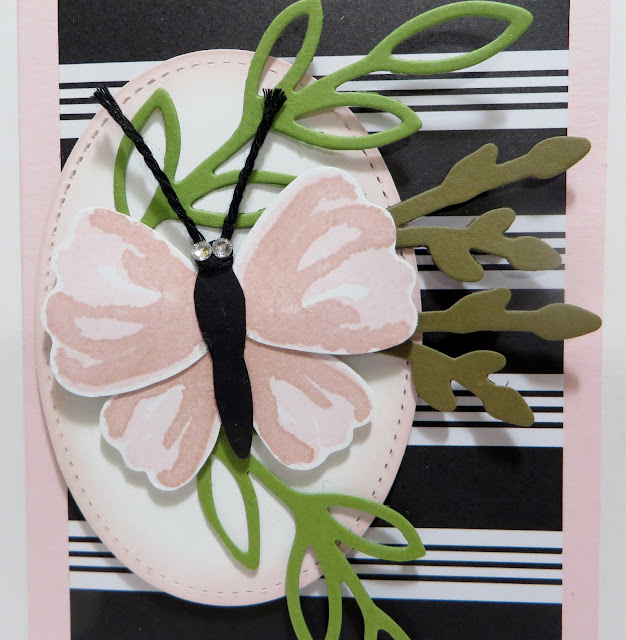
My share for today is 4 cards that I designed using Stampin' Up's It's a Sara Thing April 2017 Paper Pumpkin Kit, Bunch of Blossoms Stamp Set, Blossom Builder Punch, Everyday Jars and Stitched Shapes Framelits and Rose Garden and Butterflies Thinlits dies.
Let's take a look:
My Card Base is Pink Pirouette Cardstock cut at 5" x 7" and scored and folded at 3-1/2" for a Side Opening Card. (I made the Card Bases the approximate size of Stampin' Up's Note Cards).
I adhered one of the Black and White Striped sticker panels from It's a Sara Thing April 2017 Paper Pumpkin Kit to my Card Base.
Using SU's Stitched Oval Shapes, I die cut the Largest Oval from Whisper White Cardstock, sponged around the edges with Pink Pirouette Ink and adhered it to my Card with Stampin' Dimensionals.
Using SU's Bunch of Blossoms Stamp Set, (this is a two step stamp set) I stamped the Large and Small Solid Blossoms first in Pink Pirouette Ink and then using the second Detailed Blossom two step stamps, I stamped them in Blushing Bride Ink over the top of the first stamped Blossom. Love, Love and Love!!!
Using SU's Blossom Builder Punch, I punched out all of my Blossoms.
For the Butterflies Body, I die cut a piece of scrap Basic Black Cardstock using SU's Butterflies Thinlits Dies by only die cutting the Body portion of the Largest Butterfly die. I then trimmed the Butterflies Body with my Snips as shown in the above picture.
I adhered the 4 Blossoms to the back of the Butterfly Body with Mono Multi Purpose Glue and then Stampin' Dimensionals. Set aside.
For this Card, I used So Saffron and Daffodil Delight Inks and So Saffron Cardstock.
Using SU's Everyday Jars Framelits Dies, I die cut three Stems (for each card) from Soft Suede Cardstock and adhered two of them to the Oval with Mono Multi Purpose Glue. (I used one on the inside of each Card).
For this Card, I used Soft Sky and Pool Party Inks and Soft Sky Cardstock.
Using SU's Rose Garden Thinlits Dies, I die cut two Leaf Stems (for each Card) from Old Olive Cardstock and adhered them to the Oval with Mono Multi Purpose Glue.
For this Card, I used Wisteria Wonder and Perfect Plum Inks and Wisteria Wonder Cardstock.
I tied some Basic Black Baker's Twine for the Butterflies Antennae into a knot around the Head of the Butterfly and added a dab of Mono Multi Purpose Glue to secure the Baker's Twine a little bit more making sure that the ends of the Baker's Twine were facing up.
I added two Small Basic Jewel Rhinestones to the Butterflies Head for the Eye's.
I then adhered the Butterfly to the Oval with the Stampin' Dimensionals.
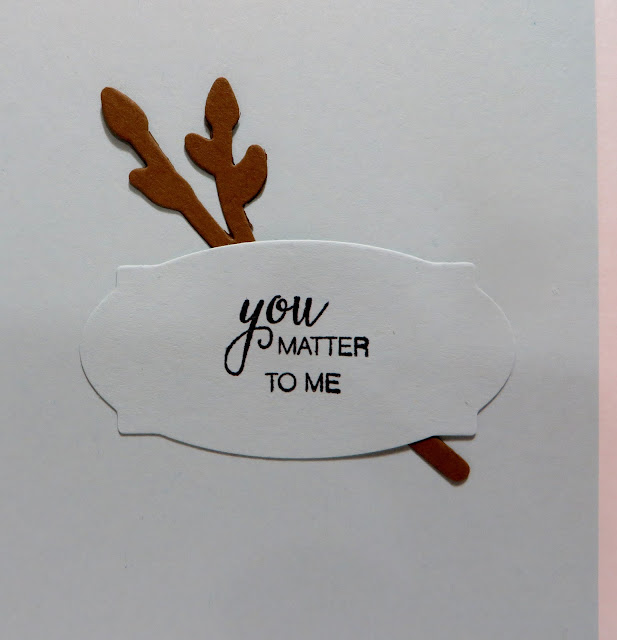
For the inside of my Cards: Using SU's Bunch of Blossoms Stamp Set, I stamped my Sentiments onto the 4 Cardstocks; Pink Pirouette, So Saffron, Wisteria Wonder and Soft Sky, in Memento Black Ink.
Using SU's Rose Garden Thinlits Dies, I die cut the Sentiments out using the Label Die.
I adhered another stem to the inside of my Card with Mono Multi Purpose Glue.
And, I adhered the Sentiment Label over the top of the Stem with Mono Multi Purpose Glue.
I even stamped my Envelopes using the two step Leaf Stamps with Old Olive and Pear Pizzazz Inks.
Come back tomorrow and I'll share with you how I made the Box for these Cards. (I'm still not feeling my best so I hope I can get my post done for tomorrow...if not, then I'll share with you on Monday).
Gosh, this was such a fun, fun project to make and I so LOVE how it turned out!
That's all I have for today. I hope you enjoyed my blog post and thanks for stopping by!
If you would like to become a Paper Pumpkin Subscriber with me, Please click on the link below to sign up.
Here
If you would like to visit my Pinterest Boards, Please click on the link below:
Here
PLEASE GIVE CREDIT WHERE CREDIT IS DUE!
I recently discovered that people are using my cards and/or projects, duplicating them and entering them into challenges, using them for their own card classes and (using them on their blogs as their own creations) - Please give credit where credit is due. My cards and projects are my own creations and are not to be used in challenges, blog hops, card classes or sold at craft shows; etc., for profit. I don't mind if you duplicate my creativity to pass on to family members or friends as gifts or Occasions cards; but, PLEASE be considerate of others creativity! Thank you!


No comments:
Post a Comment